Pinterest

Tuesday, 8 February 2022

Lady Vagabond Birthday Card Album - Belinda Basson DT

 Hello Friends

Being the world's worst at remembering birthdays, I have created a birthday card album where I can store a whole year's birthday cards in one place, for my Belinda Basson Design Team project for Stamperia this month.

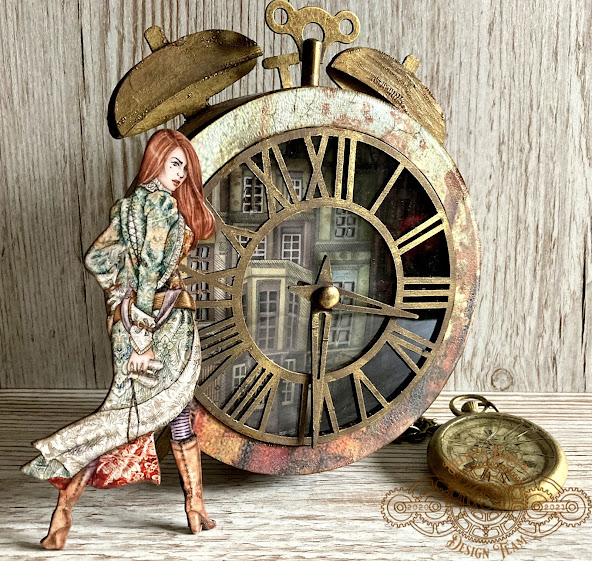
I used the wonderful papers and moulds from the Lady Vagabond Lifestyle release by Belinda Basson for Stamperia.

The finished card album measures 8" x 8" x 4 inches.  This gave me enough room to attach six double sided pockets that I spaced 1/2" apart.

As you can see below I added moulds to the front and side of the album but kept the back plain so that it will sit flat.
To create the album cover I used some foam board that I had in my stash, cutting three pieces - two 8" x 8" and the spine 4" x 8".  I used the standard album making technique for binding the cover using construction tape which is also applied around all the edges to give a neat finish.
The pocket pages inside were created in strong black card but I am showing them here in white so that the measurements can be seen more clearly.  Each of the six pages consists of taking a 15.1/2" x 10.3/4", folding it in half lengthwise at 7.3/4" and then folding the whole of the bottom piece up at 3.1/2".  Score each of the folds well.  Fold the bottom flap up and then fold the piece so that the pockets are on the outsides.

Glue the very edges of flaps in place once they have been folded, to create your pockets.  Glue the bottom half of each of the folded pages with a thin layer of glue.  Leave the sides and top free.
To create the spine to hold each of the pages, take a piece of card 11.1/2" x 6.1/2" and score at 1.1/2", 2", 2.1/2" and each half inch, making your final score at 10".  This leaves a 1.1/2" on either side.

To fold up, start with a valley fold at 1.1/2" (as indicated by the broken line below) and fold a mountain fold at 2" (as indicated in red below).  Since we want a gap between each of the spines, the next valley fold will be at 2.1/2" and then again 3".  Continue to the end and you should have 6 spine edges.    
Score all the folds well and glue each of the spine areas together with double sided tape or strong glue.  This forms the spine for your album.  Add glue to the bottom of the spine and fix in place in your album, ready for the pages to be added.

Take one page with the pockets to the bottom and glue one to each of the spines, straddling the spine, applying glue to each side of the spine.  This ensures that the spines are hidden and the pages will lie beautifully.
Now for the fun part!
Decorate the covers, inside and out and each of the pockets with your favourite papers.  I used papers from the Lady Vagabond Lifestyle range and added die cut pieces of ephemera to some of the page bottoms.  I added a month to the top of each page. 
You can see a further selection of pages below.
I turned my attention to the moulds and decided to use the ship door mould and the anchor mould.  I used quick drying resin to cast my pieces and then used a selection of Allegro paints (listed at the end of the post) to colour them.
Here is a close up of the door, I just love how it turned out!
I then made a selection of Lady Vagabond cards to put in my album.  I used papers left over from covering the album along with various Lady V die cuts for the set of cards below.
The three cards below were created using the two new Lady Vagabond Lifestyle stamp sets (details are listed below).

Thanks very much for your visit, I hope to see you again soon.

Crafty hugs,  Anne xx


Stamperia Products Used:

Stamperia Lady Vagabond Lifestyle B/G Papers 12" x 12"  SBBL100
Stamperia Lady Vagabond Lifestyle Papers 8" x 8" SBBS49
Stamperia Lady Vagabond Lifestyle 6" x 6" Papers SBBXS10
Lady Vagabond Lifestyle Mould - KT3PTA4517
Stamperia Lady Vagabond Lifestyle Die Cuts DFLDC52
Stamperia Lady Vagabond Stamp Set WTKCC206
Stamperia Lady Vagabond Stamp Set WTKCC208
Stamperia Allegro Paint - Old Ivory KAL50
Stamperia Allegro Paint - Brick Red KAL20
Stamperia Allegro Paint - Earth Brown KAL40
Stamperia Allegro Paint - Prussian Blue KAL96
Stamperia Allegro Paint - Grey KAL73
Stamperia Transparent Crackle Paste K3P50
Stamperia Mixed Media Glue DC28M 


Tuesday, 11 January 2022

Lady Vagabond Lifestyle - Time - for Belinda Basson DT

Hello Friends

Belated Happy New Year wishes to you all!  This is my first post for 2022!

Today I am sharing a project I made using Belinda Basson's, for Stamperia, wonderful recently released Lady Vagabond Lifestyle products to create a clock.  I have this vision of Lady V stepping into the clock to travel through time .... fanciful I know but hey, it was just how my brain was working when I made the clock!  Wouldn't it be lovely to be transported off somewhere magical, if only occasionally.....

I started with Belinda's Greyboard clock and  I assembled it, adding a one inch spacer to create a 3D clock.
 I then used a variety of the Lifestyle papers to decorate the clock.  I added some of the original Lady Vagabond papers to create the scene inside the clock, cutting out the windows in the houses so that I could add some mini lights.

I added a circle of acetate to the clock front so that I could add the clock face and the clock hands.
Once constructed I applied Cerantica wax to the clock bells and clock front and then gave the whole clock a coat of Stamperia Crackle Paste, adding a Lady Vagabond chipboard die cut to the outside of the clock.  I am really smitten by this image of Lady V, ordering more so that I can use her on lots of future projects!

Below is a view of the clock lit up.
Thanks very much for your visit.

Until next time.  Crafty hugs,

Anne xx


Stamperia Products Used:

Stamperia Lady Vagabond Lifestyle Greyboard Clock KLSPDA447

Stamperia Lady Vagabond Lifestyle Die Cuts DFLDC52

Stamperia Lady Vagabond  Lifestyle 8" x 8" papers SBBS49

Stamperia Lady Vagabond 8" x 8" papers SBBS27

Stamperia Mixed Media Glue DC28M

Stamperia Crackle Paste Transparent K3P50

Stamperia Cerantica Metallic Gold K3P15G


Tuesday, 14 December 2021

Lady Vagabond's Briefcase for Belinda Basson DT

 Hello Friends

My project for Belinda Basson's Design Team for Stamperia this month is a briefcase for Lady Vagabond using some of Belinda's newly released products.  All of the Stamperia products I used are listed at the end of my post.


I have condensed the photos.  I started with Stamperia Stone paper A3 size.  I crumpled the paper over and over, gently spritzing with water each time, leaving it to dry and then doing it over again until it was wrinkled enough to resemble old leather.

I attached the stone paper to an MDF briefcase from my stash, it is quite big at 14" x 10" by 2.1/2" deep, using Stamperia Colla Gel Glue. Once dry I painted the whole suitcase with Allegro Paint in Earth colour. 

I moved to the inside of the case and covered the whole inside with Lady Vagabond White Flowers Rice Paper, securing it with Colla Gel glue. I love this glue, it is clear and dries clear and can be used for sticking and sealing projects.

Next, I took a piece of Stamperia Rice Paper - luggage attached it to white card, but out the luggage and glued it to the inside of the briefcase.  I also added some frames and pictures from Belinda's new range.
I used a couple of Belinda's new moulds to create the handle and locking mechanism and also the dials that I placed on the front of the case.  The handle and locks were painted with Stamperia Allegro Paint in Brown and Metallic respectively.

The cogs on the front of the case are Belinda's Greyboard Gears, I gessoed them before painting them in a mix of Earth and Brick Red paint to give them a rusty appearance. I set them aside to dry.  

I created the lock and handle with two of Belinds's new moulds, painted them and attached them to the top of the case.
I added the Rust Effect Rice Paper to the top left and bottom right of the case (front and back) using Colla Gel to glue and seal it, before adding the rusty cogs to the front of the case.

The gauges were created using another of Belinda's new moulds, I painted them in dark brown paint and then dry brushed them in brick red paint to highlight the details.
I didn't want any bulk on the back of the case so I simply added more rice paper to finish it off.
The finished case the perfect size to store my very large collection of Stamperia Rice papers, I love it!

Thanks so much for your visit, I hope you will check out Belinda's new Lifestyle range of Lady Vagabond products, they compliment the first release perfectly.

Crafty hugs, Anne xxx


Stamperia Products Used:

Stamperia A3 Stone Paper - DFPCA3

Stamperia Rice Papers - Luggage DFSA4520, White Flowers DFSA3083, Lifestyle Frames DFSA4644 and Rust Effect DFSA4650 

Stamperia Allegro Paint - KAL 106, KAL40, KAL20, KAL 117

Stamperia Lady Vagabond Greyboard Gears Gauge - KLSPDA448

Stamperia Lady Vagabond Mould - Lifestyle Suitcase - K3PTA4518 and Lifestyle Gauges - K3PTA4519

Stamperia Lady Vagabond Die Cuts DFLDCP21

Stamperia Cerantica - Turquoise K3P15T

Stamperia Colla Gel Glue - DC30M

Friday, 10 December 2021

Ho, Ho, Ho!

 Hello Friends

A quick post just to share a large tag I made a bit back, using the new Santa Colorize die set by Tim Holtz, he is just such a jolly Santa!

I used the smallest size Etcetera tag (it is still huge) to create a scene for Santa.  I don't have a step by step - sorry, it is just one of those projects I just got lost in the making of it.

I used Christmas worn wallpaper to cover the tag before adding some Icicle Crackle Paste in the corners.  I rubbed Festive berries Distress Crayon into the crackles to highlight them.  The tree is a half tree from Tim's Woodland Trees set from a couple of years back.  I dyed the tree with various Distress Spray Stains before adding Idea-ology Christmas Tiny Lights, some alcohol ink coloured pears and then some Grit Paste to add the snow.

Santa is one of Tim's latest Colorize dies, I added a little bit of sparkle to him here and there using Distress Clear Rock Candy Glitter with the Glitter Duster.
I created the shelf using Etcetera Trims, attaching Tim's Idea-ology Icicles to the front and then coating the whole shelf in Distress Grit Paste. I added some Icicle Distress Crackle Paste to the icicles themselves which gives them a bit of a sheen. I coated the shelf and the Icicles with Glitter.  The snowballs are Idea-ology Clear Baubles coated in Glossy Accents and then dipped into Distress Clear Rock Candy Glitter.

The '25' is from an older Idea-logy set and I coloured them with Alcohol ink.  The tin lid is from the latest Idea-ology range.
To finish off I dyed some of Tim's older Idea-ology seam binding with Festive Berries Distress Spray Stain and added it to the top of my tag.

It lights up (of course!) with Idea-ology Christmas Tiny Lights.

I would like to add this to the Simon Says Stamp Monday Challenge where the theme this week is 'Santa'.

Thanks so much for your visit, I always appreciate them.

Have a lovely weekend, whatever you are doing.

Crafty hugs, Anne xx


Monday, 29 November 2021

Tim Holtz Christmas Village Green

 Hello Friends

Since watching Tim's Saturday video on 'The Village' I have wanted to make a village of my own.  I was totally inspired by the creation that the very talented Emma Williams, one of Tim's Makers had made.  You can see Emma's beautiful and very detailed village here.


I built the village over a couple of weeks so I don't have step by steps but I have a few photos to share.  The first house uses House 1 from the new Village Collection and the brickwork was created using the Mini Brickwork 3D embossing folder.

The trees are from Tim's Idea-ology Woodland lot and I sprayed them green using Distress Spray Stain in Rustic Wilderness and the edges were covered with Picket Fence Distress Paint.  I added Tiny Christmas Lights to the tree and all of the houses.
The wreaths on the houses, the gentleman and the Carol singers were created by using Tim's Vault Series: Christmas 2021 die set with black shrink plastic.  I was quite pleased with the way they turned out!  The bows on the front of the village are from the same die set too.  

The central tree has Idea-ology pearl baubles (coloured with alcohol ink) and stars but no lights and you will see why at the end of this post!

I used House 2 to create a pair of semi detached houses, I simply joined two of the houses together and added a 'drain pipe' to separate the two houses.  All of the roofs were die cut and coloured with Distress Ink in two colours, Vintage Photo and Gathered Twigs.
The Post Office was created from House 1 dies and I added the cute little awnings.  The phone box was created using the tall thin building from Tim's Paper Village die set and it even has a little telephone inside!  The post box was created with a wooden button and card - well I needed a post box to go alongside the Post Office. It was the hardest thing to create because it is so tiny....
The pathway at the front of the properties was created with Tim's Mini Cobblestone 3D embossing folder.  The 'snow' was created with Ranger Distress Grit Paste with Distress Grit Paste - Snowfall to add some extra whiteness. I carefully puffed on Distress Clear Rock Candy Glitter to add a little sparkle.

To finish off my project I added some Idea-ology feet (from years ago) and a metal plaque from Tim's new Christmas range, that says 'Season of Magic'.
And finally, I took a little video so that you can see that I added a music box (playing Jingle Bells) and turntable to bring the Village Green Christmas tree to life.  I hope it works and that you like it!

I absolutely love this new size of Village dies and I can see me using them lots more in the future.

Thanks so much for your visit, I really appreciate you stopping by.

Take care and keep safe and well.

Crafty hugs,  Anne xxx


Tuesday, 16 November 2021

Belinda Basson DT - Lady Vagabond Christmas Baubles

 Hello Friends

My project for the Belinda Basson Design Team for Stamperia this month has Christmas in mind.  I created two large baubles using Stamperia products, all of which are listed at the end of this post.

The first step is to wash the baubles in soapy water, dry them thoroughly and then apply a coat of Stamperia Mixed Media glue to the base piece of the bauble only, and allow to dry. This will give the plastic a 'tooth' so that further products will stick and stay put.
Apply a coat of Glamour Paste in Turquoise and allow it to dry.  Add the paste up to the rim but not on the rim so that the bauble will close easily.
Time to apply the glitter!  Apply a coat of Mixed Media Glue and then generously sprinkle the Glamour Sparkles (Turquoise) whilst the glue is wet.  You need patience at this point (I don't have a lot), let it dry thoroughly and then tap off the excess Sparkles.  You can put these back in the jar for your next project.
For the right hand bauble (below) an area of 'snow' was created with White Glamour Paste, sprinkled with Glamour Sparkles in White.

Next, add two of the Lady Vagabond chipboard pieces, raising them up with hot glue, silicone glue or several layers of double sided sticky pads, whichever is your preference.  You want the chipboard pieces to be level with the top.

Add a small amount of glue around the edges of the baubles and attach the top, leaving them to dry thoroughly.
Finally, apply some velvet ribbon to the edges of the bauble, attaching a bow to the top.
Do the same with the second bauble.

At this point I regretted not trying harder to fit lights to the baubles, I just couldn't get the balance right and the wires kept showing.  But, I didn't give up as I hate to be defeated!  This bauble uses the new Lady Vagabond Lifestyle chipboard pieces and I did my best to disguise the lights by creating a 'window's edge of snow' using the White Glamour Paste and White Glamour Sparkles.  I added a small pocket at the back to hold the battery pack.  Whew, not perfect but I love it all the same!
If you have not seen Belinda's new Lifestyle range I hope you will soon, it is beautiful and compliments Belinda's original range perfectly.  I am really looking forward to creating projects with it and I hope you will enjoy seeing them.

Thanks so much for your visit, I really appreciate it.
Take care, keep safe and well.
Crafty Hugs,

Anne xxx


Products Used:

Stamperia Mixed Media Glue - DC28M

Stamperia Glamour Paste Turquoise - K3P61C

Stamperia Glamour Paste Sparkling White - K3P61A

Stamperia Glamour Sparkles Turquoise - K3GGS03

Stamperia Glamour Sparkles White - K3GGS01

Stamperia Lady Vagabond Die Cuts - DFLDC27

Stamperia Extra Strong Glue- DC007GN

Tuesday, 19 October 2021

Belinda Basson DT - Lady Vagabond Book Nook

 Hello Friends

It is time to share my monthly Belinda Basson Design Team for Stamperia project and I cannot begin to tell you how much fun I had creating it! 

For many years now I have wanted to create a book nook but frankly did not know where to start!  So when I saw that CoolKatz have designed a kit, I knew I had to make one for Lady Vagabond.  The period style properties suited Lady V so well (in my mind anyway!).

A book nook is literally a miniature world that you tuck into a book shelf between your books.  If it lights up, it just makes it so much more interesting.  A strategically placed mirror at the back makes the 'street scene' look never ending...

The wonderful Stamperia products I used to decorate the book nook are listed at the end of this post.

Here is Lady V outside the pub named after her, all packed up for a trip on her beautiful airship.
It was great fun building the kit, I used Stamperia Allegro paints and Stamperia Rice paper to decorate the house and pub.  To create the illusion of leaded windows I used a permanent black pen on acetate.
I used the Lady Vagabond 8" x 8" papers to create some mini books, that were then placed in the bookshop window.
For the window above the bookshop I added a doll's house sewing machine, just for the sake of authenticity, even though it is hard to see once the book nook is fully constructed.  I know it is there and it just made me happy!
The floor of the book nook was created with Stamperia Cream Paste and I used the end of a knife blade to create the cobbled effect.  Once dry I applied Stamperia Allegro Paints to give it worn cobble colour.

The Lady V sign over the pub was created by hand from a piece of card.
Once the book nook is filed away in your bookcase you don't really see the outside but I wanted it to have a finished look and I used the Lady Vagabond 8" x 8" papers and they fitted perfectly.

I placed Lady V (Stamperia die cuts) and her luggage in the opening to the street scene so that she would not get lost inside.  Lady V's cat was stamped onto Stamperia Shrink Plastic sheeting with archival ink.  Once shrunk she was the perfect size to sit alongside her mistress.

A final view of the book nook, I just love how it looks all lit up!  I really hope you might consider making one of these, they are so much fun and they would make a wonderful gift for any avid reader.

Thanks so much for your visit, I really appreciate you taking the time.  

Take care and keep safe and well.

Crafty hugs, Anne xxx


Stamperia Products Used:

Stamperia Lady Vagabond 8" x 8" Paper Pad SBBS27

Stamperia Lady Vagabond Rice Paper White Flowers DFSA3083

Stamperia Lady Vagabond Die Cuts DFLDC27

Stamperia Lady Vagabond Flying Ship Stamps WTKCC190

Stamperia Allegro Paints - Milk White KAL110, Brown KAL106, Grey KAL73, Black KAL03, Rame Metallic KAL117

Stamperia Cream Paste - K3P53

Stamperia Extra Forte Glue DC075

Stamperia Shrinky Bits (Shrink Plastic) - DFSBA4W

Related Posts Plugin for WordPress, Blogger...

Labels