Hello Friends, this is my first of two posts today.
A new month means a new challenge at Mini Album Makers! As always, it is Any Handmade Book Goes. Enter any form of handmade mini albums, scrapbooks, journals and book arts. Our focus is on completed works, so no layouts or journal spreads that are not part of a complete handmade book project. You can find full details of the Rules on our home page.
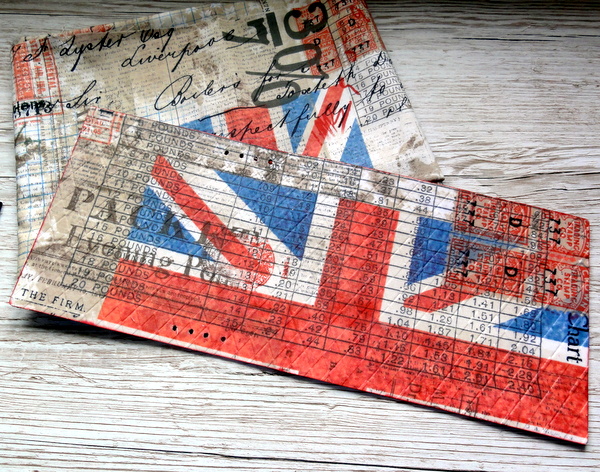
I wanted to use this beautiful Gypsy Soul Laser Cut, along with some Tim Holtz fabric, so I altered a plain journal with fabric to accommodate the laser cut.

I have a few photos to show you how it all came together.
 1. I used a ready made journal, some Tim Holtz fabric and a Laser Cut from Gypsy Soul
2. Cut the fabric to size with a 1" border all around. Glue the fabric to the outside of the journal and leave to dry.
3. Fold in and glue down the corners.
4. Fold in and glue the sides to the cover.
5. (not shown) Glue one page over the fabric at the front and back to cover the fabric, this gives a nice neat finish to the front and back.
 I usually always add a pocket or an envelope to the inside of all my journals. It is so easy to do by cutting and folding as shown in photograph one above.
For my envelope I cut the card to 8.1/4" tall x 7.1/4" wide and scored at 3.1/2" and 7". The bottom tab is 1.2" and the top fold over tab is 1.1/2".
You will need a Cropodile or hole punch and some eyelets to create the closure. Adjust the sizes to correspond with your size of journal. Once you have made one of these, it gets easier and it finishes your journal off beautifully and gives you a handy place to store small items and/or a pen or pencil.
I used the beautiful laser cut from Gypsy Soul Laser Cuts (our Sponsor this month). I embossed it with Black Embossing Powder. To finish it off I added a flower charm from my stash.
Our Sponsor this month at Mini Album Makers is Gypsy Soul Laser Cuts who will be offering a prize pack to one lucky winner.

Website - http://www.gslcuts.com/Store/
Blog - http://gslcuts.blogspot.co.uk/
Instructionals and Kits - http://gslcuts.blogspot.co.uk/p/blog-page.html
Thanks so much for your visit today, I hope you will join in this month at Mini Album Makers, we would love to see your creation(s).
Hugs, Anne xx
I wanted to use this beautiful Gypsy Soul Laser Cut, along with some Tim Holtz fabric, so I altered a plain journal with fabric to accommodate the laser cut.
I have a few photos to show you how it all came together.
2. Cut the fabric to size with a 1" border all around. Glue the fabric to the outside of the journal and leave to dry.
3. Fold in and glue down the corners.
4. Fold in and glue the sides to the cover.
5. (not shown) Glue one page over the fabric at the front and back to cover the fabric, this gives a nice neat finish to the front and back.
For my envelope I cut the card to 8.1/4" tall x 7.1/4" wide and scored at 3.1/2" and 7". The bottom tab is 1.2" and the top fold over tab is 1.1/2".
You will need a Cropodile or hole punch and some eyelets to create the closure. Adjust the sizes to correspond with your size of journal. Once you have made one of these, it gets easier and it finishes your journal off beautifully and gives you a handy place to store small items and/or a pen or pencil.
I used the beautiful laser cut from Gypsy Soul Laser Cuts (our Sponsor this month). I embossed it with Black Embossing Powder. To finish it off I added a flower charm from my stash.
Our Sponsor this month at Mini Album Makers is Gypsy Soul Laser Cuts who will be offering a prize pack to one lucky winner.
Blog - http://gslcuts.blogspot.co.uk/
Instructionals and Kits - http://gslcuts.blogspot.co.uk/p/blog-page.html
Thanks so much for your visit today, I hope you will join in this month at Mini Album Makers, we would love to see your creation(s).
Hugs, Anne xx