Pinterest

Showing posts with label AALL & Create. Show all posts

Monday, 2 August 2021

Simon Says Stamp Designer Spotlight - Week 1

 Hello Friends

I am really thrilled and delighted to have been asked to be in the Designer Spotlight at Simon Says Stamp Challenge Blog for the month of August again this year!

This week the theme is Birthday Celebrations!  It is a very special one, Simon Says Stamp Challenge Blog is 11 years old!  Happy Birthday!  The design team is also featuring AALL & Create Products this week.

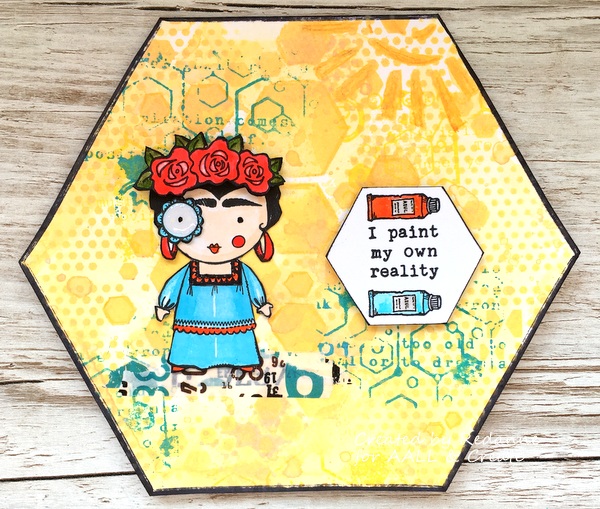
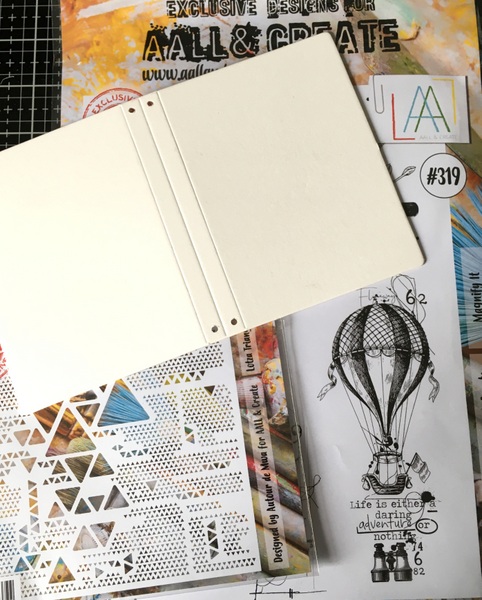
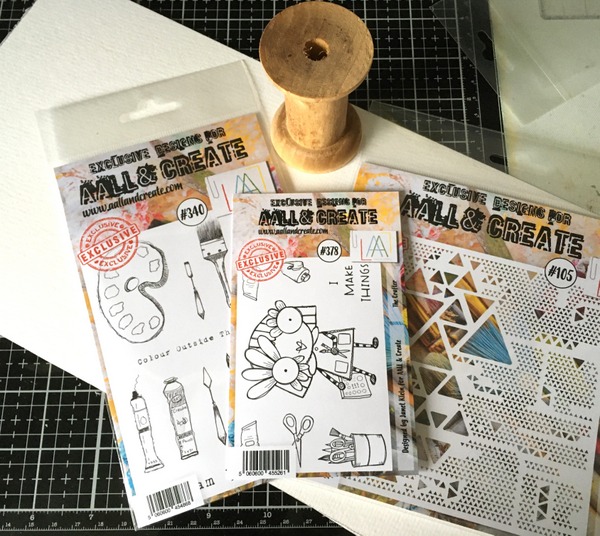
I used two sets of AALL & Create stamps and one AALL & Create stencil along with lots of Tim Holtz goodies to create a seaside themed project. 

I started by painting a Tim Holtz Etcetera Tag (Mini) and a Tim Holtz Baseboard Frame with Peacock Feathers and Twisted Citron Distress Paint before stencilling with Texture Paste through the AALL & Create Superbly Square stencil.


I then applied Clear Rock Candy Distress Paint over the tag and the frame.  This muted the colour of the Texture Paste but I was happy with the result.

Next I stamped the sentiment from the AALL & Create Background Voices stamp set onto white card.  I also stamped the lighthouse and flower from the AALL & Create Sea Essentials stamp set and coloured the images with Distress Ink.  Once dried I cut out the images and gave them a coat of Glossy Accents.

I changed my mind and didn't use all of the items shown in the photo above.

I attached the stamped images, along with the frame to the tag and then added a Tim Holtz Idea-ology Compass Coin to add some balance.

Finally I added some string from my stash to the bottom of the tag (as well as to the wooden ring at the top of the tag) before filling a Tim Holtz Tiny Vial with sand and attaching this to the string.

To celebrate the special birthday, if you enter the challenge you will have the opportunity to win a $50 voucher to spend!  How fabulous is that!

All of the products I used are listed at the end of this post.


We hope you will join in the Birthday celebrations at Simon Says Stamp Monday Challenge this week.  Thanks so much for your visit, I really appreciate it.

Crafty Hugs,  Anne xxx


Simon Says Stamp Products Used:


Thursday, 1 October 2020

Mini Books with Washi Tape

 Hello Friends

Sadly, this is my last Guest post for AALL & Create, I am definitely going to miss making weekly projects with their wonderful products.  

I am not usually a great user of Washi Tape but this latest release by AALL & Create really caught my eye and so I just had to have a play.  I made three tiny books.

I used Eileen Hull's Tiny Book die (Sizzix 664423), the book itself is 2.5 inches by 3 inches but is just the perfect size for the Washi Tape and some of AALL & Create's tiny images.

I simply applied the Washi to some matboard and then die cut each book.

I cut a piece of card for each book measuring 14 inches by 2.1/2" and scored this at 2 inch intervals.  I also cut some mats to fit each part.  These were decorated with some stencilling and inks in colours to match the cover.
The little characters below are from a variety of stamps by Janet Klein.
The second book was decorated inside and out with Washi, ink and a background stamp by Tracy Evans.  I love how the words pick up the colour from underneath.

In each case I added an elastic closure and on this one I used the Washi again to create a title.

The last little book is, I think, my favourite, I love the boldness of the red and black crosses against the white background.  To create the button closure on this one I applied Washi to some thick card and die cut the circle, adding some holes for the elastic to thread through.  The inside, at the moment is blank.

Thanks so much for your visit.

Keep safe and well.

Hugs, Anne xx


Wednesday, 23 September 2020

Frida

 Hello Friends

The Guest Designers at AALL & Create this week are creating cards.  I just received a DT package with some new stamps and stencils and the Frida stamp by Janet Klein seemed the perfect choice to go with my new goodies.

I used all of these goodies to create my little 6" x 6" card.
Hands up, I had to Google how to draw a Hexagon.  Once I had my template I traced it onto some watercolour cardstock and then cut out my card shape.

I used Scattered Straw Distress Oxide to create a background.
I used my new stencil Heapza Hexagonz (#112) and Scattered Straw Distress Oxide to create a background pattern before accenting this with stamp #384 - Lined Hexagons by Bipasha BK using Peacock Feathers Distress Oxide.
I stamped the beautiful Frida - stamp #377 by Janet Klein onto a separate sheet of watercolour card, coloured Frida with watercolours and then fussy cut her .  I used Autour de Mwa's fabulous new Washi Tape to create a grounding for Frida.
I used another fabulous new stencil - Hugely Hexagonal #108 to trace a Hexagonal shape and stamped my sentiment and two tiny paint tubes using the Frida stamp set. 
 I coloured the sentiment with watercolours before attaching to my card.

I decided to add a little more stencilling in the top right corner by using stencil #95 - Sunrise by Janet Klein.  Finally, I edged the card with black marker pen.
Here is a close up of the beautiful Frida.

Worldwide stockists for the stamp, stencils and washi tape I used on this project can be found HERE.

Thanks so much for your visit, I really appreciate it and hope to see you again soon.

In the meantime please keep safe and well.

Hugs, Anne xxx


Wednesday, 16 September 2020

Beetle for AALL & Create

 Hello Friends

My Guest Designer project for AALL & Create this week is a journal page.  I don't do journal pages very often, mainly because I like to create on a flat surface, so I took a page out of my journal and started...

I used Tracy Evans' Beetle stamp set (#335), along with stencil #19 by Autour de Mwa and the Chequered Figures die set (#22).  I think they compliment each other very well.

1)  I started by stamping the Beetles onto watercolour card with Archival Ink.

2)  I applied texture paste through stencil #19 and added some Cracked Pistachio Distress Glaze, randomly, allowed it to dry and then heated it.

3)  Next, I spritzed the card with water before adding watercolour in turquoise and let it run down the page and let it dry.  

4)  I die cut the Chequered Figures and applied them to the page and then added splatters to the page.

5)  Finally, I stamped and coloured separate beetles with Crackling Campfire Distress Ink, cut them out and added Glossy Accents to give them a shine, before adding them to the page.

Worldwide stockists for the stamp, stencil and die that I used can be found HERE.

Short and sweet this week, I hope to see you again soon.

In the meantime, stay safe and well.

Hugs, Anne xxx


Wednesday, 9 September 2020

Magnify It for AALL & Create

 Hello Friends

I am here this week to share my Guest Designer project for AALL & Create.  I created a mini travel journal using two stamp sets by Bipasha BK - Magnify It (#319), Navigate Home (#323) and Autour de Mwa's stencil Lotza Trianglz (#105).

I started by using Eileen Hull's Notebook die (Sizzix 663635) as my base.
Using Paper Artsy paints in Aquamarine and Snowflake I brayered the paint over the journal base and then applied Snowflake paint to the stencil, spritzed it with water and applied it to the journal.  This gives a nice gentle reproduction of the stencil.
Next I stamped the balloon onto the cover, and the binoculars onto the back.  I coloured the balloon with the fabulous new Crackling Campfire Distress Ink by Tim Holtz.  I added the words using Tim's Ideology Big Chat Stickers.
I created two signatures by painting with the same paints and then using the Lotza Trianglz stencil with a white pen to trace through the stencil onto the background.  Again, this gives a nice gentle image.
The first signature was stamped with the Binoculars from stamp set #323.
The second signature was stamped with the stop watch from stamp set #323.
To finish off I created a charm set.
Another look at the finished journal.

A list of worldwide stockists for the stamp sets and stencil I used are available from AALL & Create HERE.

Thanks so much for your visit, I hope to see you again soon.  In the meantime, stay safe and well.

Hugs, Anne xxx


Wednesday, 19 August 2020

The Great Outdoors for AALL & Create

 Hello Friends

I hope you are all staying safe and well.

My Guest designer project for AALL & Create this week is a card.

I started by creating the background, using the gorgeous Abundance stencil #85 by Olga Heldwein and PaperArtsy paints on my 5" x 7" Gelli plate layering up several times to achieve the background I wanted.

Next, I stamped the gorgeous flower (twice) from Tracy Evans' The Great Outdoors stamp set #370.  I love this flower, it reminds me of a waterlily.  I coloured the flowers with watercolours (Art by Marlene) and fussy cut the flowers before decoupaging them.

I die cut the vase (Tim Holtz die) from black card, stencilled using the same stencil as previously and PaperArtsy paint, and once dry I gave it three coats of clear embossing powder to give a lovely sheen.
To finish off, I added some washi tape to ground the vase and I used 3D gel to add the vase and the flower.

You can find a list of worldwide stockists for the stamp set and stencil is used on my project HERE.

Thanks so much for your visit, please stay safe and well and I hope to see
you again soon.

Hugs,  Anne xxx

Wednesday, 12 August 2020

Butterfly Lady...

 Hello Friends

I am back with a mixed media project as Guest designer for AALL & Create.

I used Olga Heldwein's gorgeous new Flutterby stencil #98, Olga's Take Flight stamp set #367, Autour de Mwa's Bubble Block stamp set #310 along with his Totally Dotty stencil #87.

Starting with the Totally Dotty stencil I created a Gel Press background using PaperArtsy paints, adding several layers of paint to create a delicate stencilled look.

To create the butterfly, I applied Versafine Clair ink (Fallen Leaves) through the butterfly (Flutterby stencil) to white card, carefully going around the edges to create a border.  I then applied clear embossing powder before heat setting, and then cut out the butterfly.  I used Seth Apter's Izink Dye Spray in Sunflower to add colour to the butterfly.

I prepared my media board by inking around the edges with the same Versafine Clair.  I stamped and watercoloured the lady and then fussy cut her.  The sentiment is a Tim Holtz one.

I stamped a few elements from the Take Flight stamp set onto my background, stamped and cut out the circular element for the butterfly lady to sit on.

To finish off I added the lady, her wings and the sentiment to the background and then mounted the background to my board.

A list of worldwide stockists for the stamps and stencil I used can be found HERE.

As always, thanks so much for your visit, I hope to see you again soon.  Keep safe and well in the meantime.  Hugs,  Anne  xx


PS. A few people have asked me to share the artist's messy desk I created a while back for one of Tracy Evans' Hochanda shows, and here it is.  I used matchboxes to create the desk and Tracy's stamps to decorate it. 


Wednesday, 5 August 2020

The Crafter for AALL & Create

Hello Friends

Well, here I am, twice in one week, with something completely different to my last post!

My Guest designer project for AALL & Create this week is a mini album created with a wooden spool bobbin.
I used The Crafter stamp set by Janet Klein, together with the Paint Your Dreams stamp set by Tracy Evans, the newly released stencil - Lotza Trianglz by Autour de Mwa and an A3 size piece of watercolour card for the album element.
I cut a piece of the watercolour card to fit the spool.  I used Distress Inks to colour the strip of card and stamped the elements I wanted along the strip.  I used the Lotza Trianglz stencil and Texture Paste to add some detail and then coloured the elements with watercolours.  The Crafter was stamped, coloured with watercolours and fussy cut.  The spool was gessoed in white.
I added some stamping to the reverse side of the card and coloured with watercolours.  The spool was painted with Distress Paint in Picked Raspberry.  I made a little sign for the top, using a cocktail stick wrapped in thin wire, along with a scissors charm.
For my closure, I attached a small button and a piece of elastic.
Here is a view from the top. I added the sign, scissors and a paper clip to the top of the spool with some 3D glue.

You can find a list of worldwide stockists of the stamps and stencil I used HERE.

Thanks so much for your visit, I hope to see you again soon.

Keep safe and well.  Hugs, Anne xxx


Related Posts Plugin for WordPress, Blogger...

Labels