
I have been making leather journals for many months now but rarely show them on my blog because they are generally gifts to family and friends. In Eileen Hull's Fan Club on Facebook there have been quite a few questions about using leather to make journals. I thought I would try and answer some of those questions with this short tutorial on how I create a leather journal.
If you visit and read this tutorial and you still have questions, please leave your questions in the comments, along with a way that I can get in touch with you and I will do my best to answer them.

Here is my latest embossed leather journal.

I gathered together the items that I wanted to use to make the journal, these are:
Eileen Hull's Passport die by Sizzix (660331)
Eileen Hull's Embossing Folder by Sizzix - Waffle (659879)
A piece of good quality red leather
Red cardstock to match the leather - for lining the journal and also for signatures
A Premium Crease Pad (by Sizzix) - I only use my Crease Pad for leather as there is less tendency for the die to cut completely through the leather on the score lines
Leathercraft Glue
TIPS
1. You do not need to buy expensive leather, I use between 1.5 and 2mm where possible. If you are based in the UK, you can buy excellent quality leather from www.artisanleather.co.uk - An A4 (8.1/2" x 11.1/4" approx) piece of leather will make one Passport sized journal, with a little left over.
2. I glue cardstock to the 'fuzzy' side of the leather, this gives the leather a little more stability. I found that if I did not glue cardstock to the leather, it 'stretched' when die cut.
3. It is not essential but I always use a Premium Crease Pad when cutting leather as there is less tendency for the die to cut completely through the leather on the score lines. If you do not have or don't want to invest in a Crease Pad, and the die cuts right through the spine, you can add some Washi tape, or regular cardstock to the inside of the spine to hold it together.
4. I strongly recommend that you use a good quality leather glue and that you follow the instructions carefully. I always leave the glued elements overnight to ensure good adhesion.

Top left - die cut the leather pieces (in my case, backed with cardstock)
Top right - leather embosses beautifully with standard embossing folders
Bottom left - the embossed leather
Bottom right - embossed front and back but no embossing to the spine
TIPS
5. Embossed leather is very beautiful but it can be tricky! It is a good idea to 'practice' on an off-cut of leather before committing to embossing your die cut leather pieces.
In the above example I used a Big Shot to cut my leather, using the base plate and also the A plate, and passed the embossing folder through without the two cutting plates. It embossed beautifully and quite deeply.
For thicker leather you may need to adjust the plates that you use, it really is trial and error, but be careful - if it doesn't go through your machine, stop and try a different configuration of plates.
6. When gluing the spine to the front and back of the journal, especially if you have embossed it, it is a good idea to leave it to set, overnight if possible.
 Once you are satisfied that the glue is completely dry, go ahead and add bindings of your choice. A view from the outside.
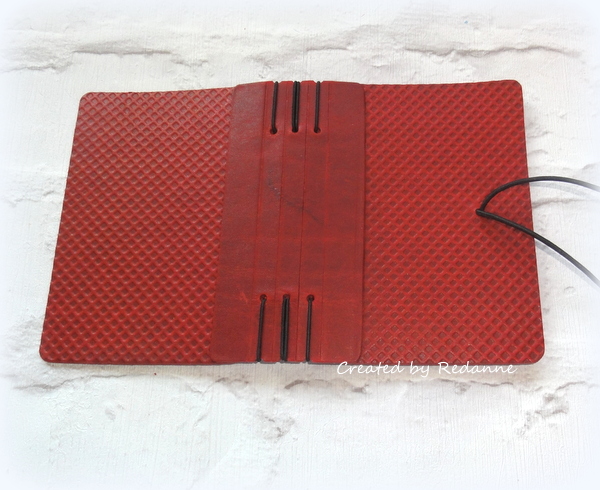
 A view from the inside, ready for the signatures. I usually add a pocket to the inside back cover to hide the elastic closure.

I created three signatures, using the Passport die to cut the inserts for each signature and then made covers from red cardstock, slightly larger than the inserts. The beautiful images on the signatures are from Alexandra Renke's gorgeous design papers and Washi tape range.
 One final look - I always add charms to the side of my journals, using hinge clips. You can also create a loop to hold a pen, which is always useful when you want to keep notes!
Thanks for looking, I hope you picked up a tip or two. Hope to see you
again soon. Hugs, Anne xx
3. It is not essential but I always use a Premium Crease Pad when cutting leather as there is less tendency for the die to cut completely through the leather on the score lines. If you do not have or don't want to invest in a Crease Pad, and the die cuts right through the spine, you can add some Washi tape, or regular cardstock to the inside of the spine to hold it together.
4. I strongly recommend that you use a good quality leather glue and that you follow the instructions carefully. I always leave the glued elements overnight to ensure good adhesion.
Top left - die cut the leather pieces (in my case, backed with cardstock)
Top right - leather embosses beautifully with standard embossing folders
Bottom left - the embossed leather
Bottom right - embossed front and back but no embossing to the spine
TIPS
5. Embossed leather is very beautiful but it can be tricky! It is a good idea to 'practice' on an off-cut of leather before committing to embossing your die cut leather pieces.
In the above example I used a Big Shot to cut my leather, using the base plate and also the A plate, and passed the embossing folder through without the two cutting plates. It embossed beautifully and quite deeply.
For thicker leather you may need to adjust the plates that you use, it really is trial and error, but be careful - if it doesn't go through your machine, stop and try a different configuration of plates.
6. When gluing the spine to the front and back of the journal, especially if you have embossed it, it is a good idea to leave it to set, overnight if possible.
I created three signatures, using the Passport die to cut the inserts for each signature and then made covers from red cardstock, slightly larger than the inserts. The beautiful images on the signatures are from Alexandra Renke's gorgeous design papers and Washi tape range.
Thanks for looking, I hope you picked up a tip or two. Hope to see you
again soon. Hugs, Anne xx


