Pinterest

Showing posts with label Wendy Vecchi Embossing Powder. Show all posts

Monday, 1 January 2018

Mini Album Makers January Challenge

Happy New Year Friends!

Since it is the first day of the month, not to mention a new year, it is time for a new challenge at Mini Album Makers.  As always, it is an anything goes challenge as long as you make a complete album, book  or journal.

I decided to make a mini album this month.
As another new year begins, my thoughts turned to Valentine's Day and I made a 4" square mini album from two sheets of 12" x 12" paper and some fabulous Gypsy Soul Laser Cuts... (all of the Gypsy Soul products I used are listed at the end of this post).
1.  Score a 12" x 12" piece of heavyweight paper at 4" and 8" on two sides
2.  Cut so that you have three single folded pages and one page with an extra flap (see above)
3.  Punch a half circle in the flap element, and use strong tape or glue on three sides to form a pocket - this would form the inside back page of the album.
4.  Glue all four of the page pieces back to back to form a 'booklet' style album
I chose this beautiful Gypsy Soul frame for my front cover and embossed it with Wendy Vecchi Embossing Powder in Red Geranium.  I gave it two coats so that it is beautifully glossy.
I glued the frame to the front cover of the album. At this stage I was undecided about decoration for the cover.

Since I had Valentine's Day in mind I opted for two hearts and embossed them with the same red embossing powder.  Whilst the EP was still hot I stamped into each heart with a script stamp to add some texture.

I dyed a piece of vintage seam binding with Festive Berries Distress Stain, attached it with a staple on the front and then glued the hearts on top as shown above.
To decorate the inside pages I chose a 12" x 12" piece of Maja Design double sided paper and cut this into 4" squares.  I trimmed five pieces, used Festive Berries Distress Ink to finish the edges and attached them to the inside pages.  For the remaining pages (including the pocketed back page)  I cut a half circle in the top and added glue to three sides to create further pockets.

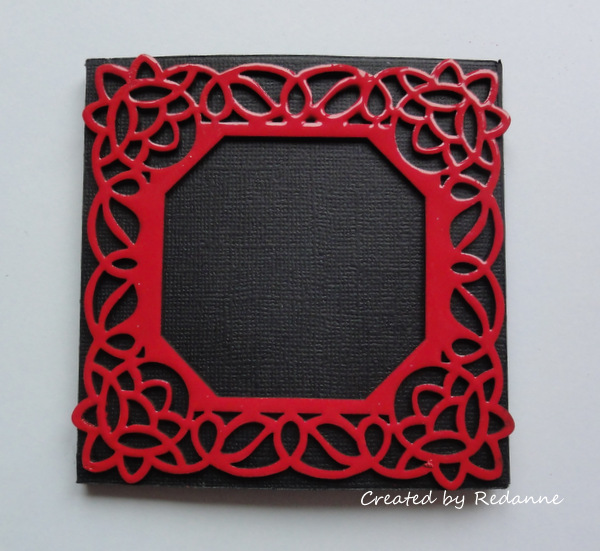
I decorated one side of each pair of pages with some more beautiful Gypsy Soul Laser Cuts, each of which I embossed with the same embossing powder as before.
I used the remaining square of patterned paper to cover the back of the mini album.

There is plenty of space on the pages to add photos and/or memorabilia.  This is such a quick and easy design to create and I think it would make a wonderful substitute for a Valentine's card - it would be lovely filled up with personal messages and sentiments.....

So, I do hope you will join in at Mini Album Makers this month!

Our Sponsor this month is the wonderful Lindy's Stamp Gang who are offering a $25 Gift Voucher to one lucky winner.


Website - https://www.lindysgang.com/
Blog - https://lindysgang.blog/
YouTube - https://www.youtube.com/user/lindysgang/


As always, thanks so much for your visit and I hope to see you again soon!

Hugs,  Anne  xxx


Products used from Gypsy Soul Laser Cuts

Saturday, 6 June 2015

The Men in our lives...

Hi Everyone

June is the month of Father's Day on both sides of the Atlantic.  Male cards are always notoriously hard to do so I have made a quickie card, that could be used for almost any occasion.

I started by using plain white card, nothing special and embossed it using Tim Holtz Compass Texture Fade ( Embossing Folder).  I carefully coloured the sections with Gathered Twigs, Broken China and Vintage Photo Distress Inks.  I used Tim's spritz and flick technique, using water to create the splotches in the background.

The Gentleman is from the Tim Holtz Time Travellers stamp set, I stamped him and coloured him with Brushed Corduroy, Antique Linen, Spun Sugar and Broken China Distress Ink.

The charm and word band are from Tim's Idea-ology range, as is the clip.  I dabbed over the clip with Wendy Vecchi's Sky Blue Archival Ink and then added Sky Blue Embossing Powder and heated it.  I love using Embossing Powder in this way, the clip now looks like it has been enamelled.  The words on the charm (Wander) and the word band (the journey awakens the soul) have been coloured with Broken China Distress Paint (just generously coat with the paint, leave a moment or two and then wipe off the top surface).

To finished the card I mounted it on to some corrugated card (stained with Vintage Photo Distress Ink) from my stash and then mounted this onto plain black cardstock.

All of the items I used are from Inspiration Emporium, if you do decide to shop there, the postal rates are extremely competitive, both in the US and Europe and you can use my code Redanne to receive a 10% discount off your whole order.

Thanks for looking, I hope to see you again soon.  Big hugs, Anne xxx


Products used:
Tim Holtz Time Traveller stamps
Tim Holtz Texture Fades - Airmail and Compass set
Tim Holtz Distress Inks -various colours
Tim Holtz Idea-ology
Wendy Vecchi Embossing Powder - Sky Blue
Wendy Vecchi Sky Blue Archival Ink
Related Posts Plugin for WordPress, Blogger...

Labels