
Hello Friends
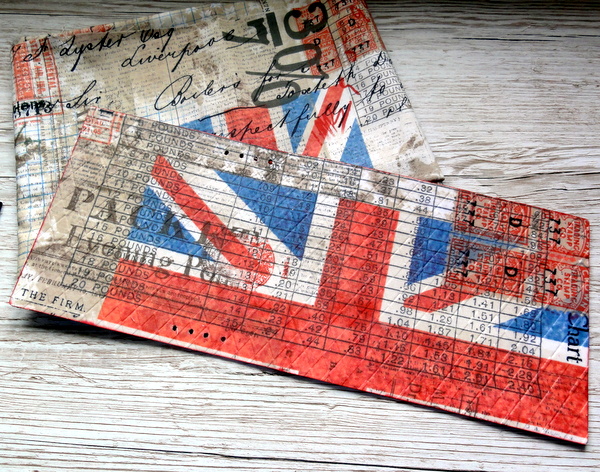
During August, Eileen Hull's Inspiration Team are sharing some of their favourites of Eileen's dies. I have to admit my favourite changes as soon as Eileen brings out a new set of dies! My current favourite is Eileen's Wrapped Journal die - Sizzix 662816, which I have used with another favourite - Tim Holtz fabric and beautiful soft red Leather...

I have kept it quite plain on the outside, but it is not quite so plain inside! I will take you through a few of the steps, this is such an easy journal to make...
 1) I buy quite large pieces of leather and so I always cut down the leather with a sharp knife, so it fits the size of the die better. This leather is very soft so I took extra care. I attached the leather to a piece of mount board and left it overnight to thoroughly dry, before cutting with the journal die.
2) I chose one of my favourite Tim Holtz fabrics for the inside.
3) I glued the fabric to the inside of the die cut journal with Multi Medium and let it dry. Once dry, carefully cut around the journal, cropping the fabric close to the journal. If you are worried about edges fraying, just use your finger to apply some Multi Medium around all the edges.
4) I used a harlequin pattern embossing folder that had a repeating pattern and embossed the whole of the journal. You need to be careful when embossing leather, always try it out on a spare piece of leather, experimenting with the plates in your die cutting machine to get the right emboss.
 You can, of course, emboss the leather before you add the fabric, but I prefer to do it after attaching the fabric, it seems to create a better 'bond'.
 I like to add a pen to my journals, as I can never find one when I need one!
5) Take a piece of card, to fit the spine that does not have the string holes in it and wrap it in your chosen fabric. Take a length of 1 inch elastic and hand or machine stitch the elastic about one third of the way across the covered card.
6) Place your pen on the card so that you will stitch the other side in the right place, mark it, remove the pen and stitch.
7) Cut the ends of the elastic off, seal the edges with Matte Medium.
8) Glue the piece in place along the spine and leave to dry thoroughly.
 Create your signatures. I used the remains of the fabric to cover card measuring 7.1/4" x 4.7/8" and fill with paper of your choice.
 String the journal with elastic of your choice. Eileen shared a video HERE (the stringing sections starts around 54 minutes in) showing a simple way to string the journal so that it will take up to six signatures.
 Here is a view of the completed inside. I added a button to the front and added a simple elastic closure on the front inside flap.
 A final look at the completed journal, it is really soft and tactile! I added a couple of charms to the side for decoration.
Thanks for your visit, I hope you will keep an eye on Eileen's blog HERE, where my talented team mates will be sharing some of their favourite dies this month!
I will be back again on Monday with my Simon Says Stamp project, which also uses one of my favourite Eileen Hull dies.... hope to see you then!
Hugs, Anne xx
2) I chose one of my favourite Tim Holtz fabrics for the inside.
3) I glued the fabric to the inside of the die cut journal with Multi Medium and let it dry. Once dry, carefully cut around the journal, cropping the fabric close to the journal. If you are worried about edges fraying, just use your finger to apply some Multi Medium around all the edges.
4) I used a harlequin pattern embossing folder that had a repeating pattern and embossed the whole of the journal. You need to be careful when embossing leather, always try it out on a spare piece of leather, experimenting with the plates in your die cutting machine to get the right emboss.
5) Take a piece of card, to fit the spine that does not have the string holes in it and wrap it in your chosen fabric. Take a length of 1 inch elastic and hand or machine stitch the elastic about one third of the way across the covered card.
6) Place your pen on the card so that you will stitch the other side in the right place, mark it, remove the pen and stitch.
7) Cut the ends of the elastic off, seal the edges with Matte Medium.
8) Glue the piece in place along the spine and leave to dry thoroughly.
Thanks for your visit, I hope you will keep an eye on Eileen's blog HERE, where my talented team mates will be sharing some of their favourite dies this month!
I will be back again on Monday with my Simon Says Stamp project, which also uses one of my favourite Eileen Hull dies.... hope to see you then!
Hugs, Anne xx


