Pinterest

Saturday, 28 December 2013

The most wonderful time..... and Mr Holtz

I hope you have all had a magical Christmas and are now looking forward to a wonderful New Year!  I was not going to post this project for reasons I will explain in a moment.  Mr Mojo took off on his holidays as soon as he knew I broke my hip and sadly, he has not been back much at all since!  The dilemma was, how do I create Christmas cards for family and friends without any inspiration.....

And along came Mr Holtz and his fabulous skate die which I had just purchased.  He posted THIS and I was inspired!  I did a tag card shamelessly copying his design to see if using his techniques would give me some ideas and it did.  Off I went making lots of cards and gift tags using the skate die (and this time using my own ideas!).  But they have all been given away to family and friends and I did not want to end the year without doing one more post...... so all I have left is this tag card and my leather look skate which I have already blogged.


The only differences between my tag and Tim's is the embossing folder I used and I added one of Tim's beautiful idea-ology ice skates and a brown ribbon bow at the top.  For details on the 'how to' please follow the link to Tim's blog.


This really is the most wonderful time of year, when family and friends come together to share the joy of Christmas and look forward to a new year.

Many people are showing their favourite makes for 2013 and what better way to round off the year.  I am just going to show you one, something that I am totally happy with (we are our own worst critics aren't we?), my Halloween Configurations box.   I followed the tutorial by the very talented Richele Christensen, it was an absolute delight to make and I won the most fantastic prize from Richele of guess what? - a bumper bundle of Tim Holtz goodies so I have plenty to play with next year..........  I am linking this up with Jennie the Artistic Stamper HERE who is asking us to show our favourite piece from this year.  You can find my original piece here.


 I have a lot to thank Tim Holtz for and long may it continue, despite it making me rather poor most months!

And finally, it would take me forever to thank people for their kindness this year, so I just want to say a very big thank you to all my friends and followers who were kind enough to visit my blog and leave comments, those who sent me well wishes, beautiful cards, wonderful gifts and most of all, those who shared friendship.  I am truly thankful for each and every one of you so THANK YOU!

I wish you and yours all the very best for 2014 and hope that it is happy and healthy and that you get lots of time to create your own forms of art.  Big hugs, Anne xx

Tuesday, 17 December 2013

Tim Tag December 2013 and something different

Tim's tag for December is, I think, my most favourite one this year.  I cannot think of a better marriage than Tim's Frosted Film and Wendy Vecchi's Clearly for Art!  This tag was such fun and the resulting flower is just stunning.  To see Tim's original you can go HERE.

Without further ado, here is my effort:


I actually loved Tim's tag so much that I didn't want to do anything different, although sadly, I do not yet have the sentiment stamp that Tim used and I did improvise by using a Stampendous stamp.  Other than that I followed Tim's tutorial exactly.  If you want further details then please have a look at Tim's link above.

Here is a close up of the gorgeous flower and you can just see a hint of the stencilling I did in the background, using Tim's star stencil.

                                         ***********************************
And now for something a little different.  I think you know how much I love using Tim's new skate die, I have made lots of cards with it this year and will never tire of using it.  My lovely blog friend Angela (if you have not looked at her blog before, I hope you will, she is a very talented lady) put a note on my blog telling me of some Dutch friends she has, who have a very old pair of brown leather skates.  Well that got 'the little grey cells' awakened and then they went into overdrive!  I don't have any leather but I do have a pack of Tim's Kraft Glassine so I did some experimenting and this is the result (click on the photos for a closer look):


I did a couple of attempts which did not work, the Kraft Glassine on it's own is not strong enough to put laces through so I used some double sided adhesive sheets.  I screwed up and crumpled up the Glassine, put some double sided adhesive sheets on the back and then attached this to some Kraft card stock and bingo - it was strong enough to take the laces.

I used a white base card, matted and layered with some more Kraft card.  The top layer is some patterned paper from my stash and I randomly stencilled over the top with Tim's Dot Fade stencil.  I added the Merry Christmas from the Simple Sayings stamp set and some greenery in the corner from the Festive Greenery strip die.


To make the heel and the blade of the skate I did this on white card, coloured the heel with Wendy Vecchi Potting Soil Archival ink (my current favourite) and covered the blade with Treasure Gold in Pewter.

To age the faux leather of the skates I took a piece of cut and dry foam and randomly brushed Potting Soil Archival ink over the skate.  I am really pleased with the result, in real life it does look like aged leather.

Thank you for looking and in the event that I do not post again before Christmas, I would like to wish you all a Merry Christmas and a very happy and healthy New Year!  Thank you all for being such wonderful and caring and supportive blog friends.  Big hugs, Anne xxx


Sunday, 15 December 2013

A Very Vintage Christmas

This month, over at Our Creative Corner, the lovely Laura has chosen the challenge theme which is 'A Very Vintage Christmas'.  In Laura's own words:

For this challenge we are abandoning traditional Christmas colours and are giving Christmas a Vintage tone.  No reds, no greens, just neutrals.

Quite the challenge for me, I don't do either neutral or vintage very well but once I started I actually loved it!  I was able to use my new (and current favourite) ice skate die by Tim Holtz to make a Christmas card.  I liked it so much I made a few.  For a closer view just click on the photos.


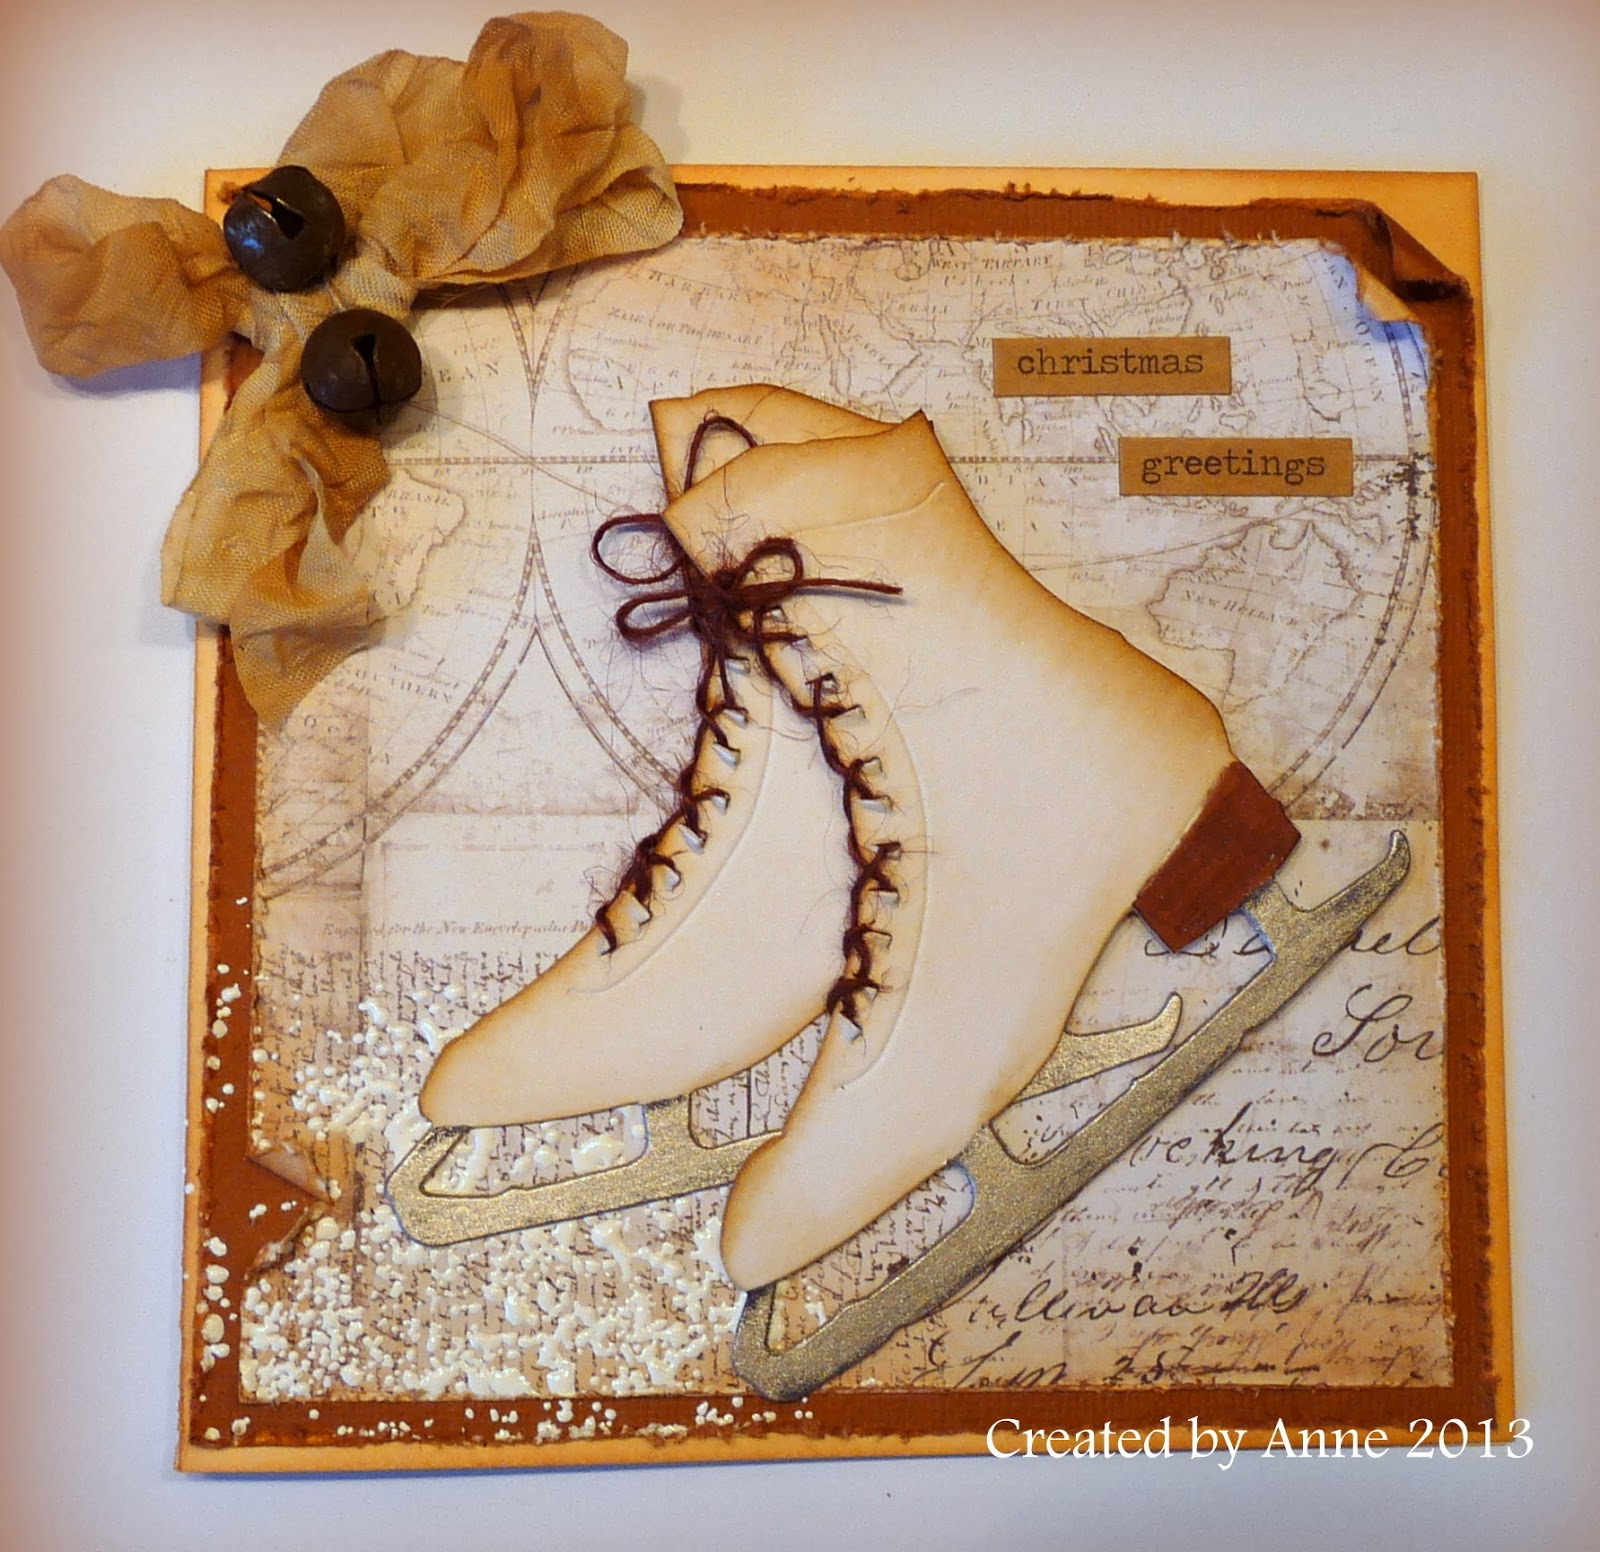
The base is a 6" x 6" square white card which I coloured with Tea Dye Distress Ink.  I then matted two layers, one in Frayed Burlap core'dinations card and one in a rustic map design paper from my stash.  The edges were roughed up and coloured with Tea Dye DI.  I added some Frantage to the bottom corner to give the appearance of snow or ice.  The sentiment is from Tim's Seasonal chit chat stickers, part of a huge parcel of Tim goodies that I won from Richele Christensen for my Halloween Configurations Box.  She knows me well and my obsession with Mr Holtz's products, it seems!


I inked the edges of the skates to give them a vintage feel.  The beauty of this skate die is that it has little holes in it where you can actually add laces.  The laces are made from some twine and the blades have been coloured using Treasure Gold in Pewter.  I dabbed this on with a paint brush, again to give a mottled and aged appearance.


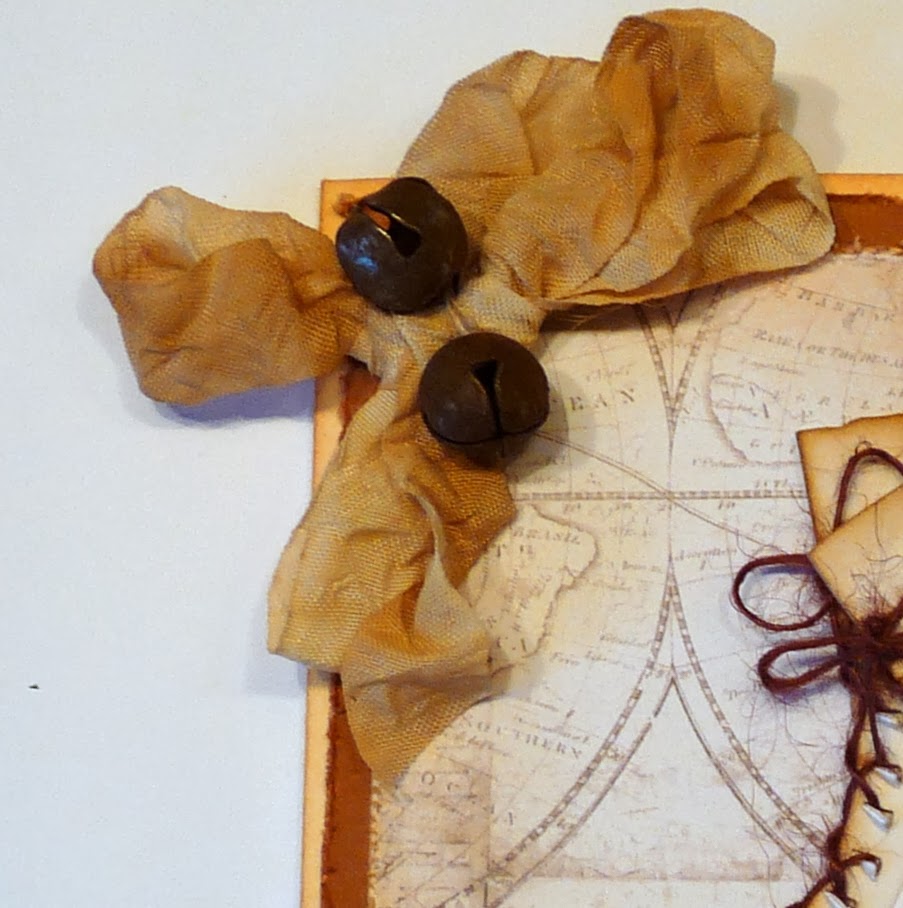
At the top I added some vintage ribbon which was coloured quite randomly with Tea Dye DI and the fabulous rusty jingle bells.

We would love you to join in the challenge at Our Creative Corner, there is still time, the challenge closes on 28 December 2013.  Please have a look over HERE for full details of the challenge.  I hope you will go over here and visit to see what my other teamies have made - I promise you will not be disappointed!

I would like to say a huge thank you to my long standing followers and also to my new ones, it is so lovely to have you along on my creative journey.  I really do appreciate all of you!  As some of you know I have recently been a bit indisposed and Mr Mojo went on his holidays around the same time, but I hope to get back to creating and blogging a little more often in the new year.  I will be back soon though with my Tim Tag for December, I could not end the year without completing the last one. Hope to see you then.

Edited:  I intended to link this up to Country View Crafts challenge blog where the theme is Bah Humbug and there is a fabulous prize of £20 to spend in the shop or a place on Brenda Brown's workshop!

Big hugs,  Anne x x

Saturday, 30 November 2013

Luminary - A Christmas decoration

This is a scheduled post, so hopefully it works, as I am enjoying the delights of the fabulous artist that is Finnabair along with my lovely friend Annie.

I have wanted the Tim Holtz Luminary die since I first saw it on a video from the CHA.  I finally got my hands on a couple of die cuts and set about making a start on some Christmas decorations.


To be honest, it is not the easiest die to use when you have stiff, arthritic hands but it looks great as a finished article so I am going to make more to line up on the window sill at Christmas.

This is how it started.


Those who have this die already will appreciate my next comment, I think.  I made the mistake of painting the pieces before I put them together.  I used Distress Paint in Brushed Pewter and gave each piece two coats, front and back.  The second coat was randomly placed to create a more distressed metallic look, which you can see below.  The paint made the pieces a little stiff and folding them was not so easy.


The 'glass' is made from Wendy Vecchi's Clearly for Art, using a technique that Wendy demoed, which is putting a coat of Glue and Seal on the CfA and then when dry, coating it with Ranger Distress Crackle Paint.  I love that 'Jack Frost' look it creates.


To decorate the top I used Tim's Pinecone and Branch die.  The pinecones have been coated with glue and glittered to resemble a light dusting of snow.

To finish off I added a Tim Word Band saying 'good tidings of peace and joy' which I attached with some thin red ribbon and added a couple of bows.

Now, I really must get cracking with making some Christmas cards.  I did buy a few from Jenny (Buttons) who did a Craft Fair last weekend, the cards are absolutely gorgeous, so I have got a lot to live up to!  I also bought the gorgeous Christmas tree Jenny made which you can find here.  How lucky am I?

The old hip is mending slowly, still have to keep the weight off it for another 4 weeks, which is the most frustrating part, but I am being good (for once) and doing what the Doctor orders.........lol.

Thanks for visiting, hope to see you again soon.  Hugs,  Anne xx

Monday, 18 November 2013

Tim Tag November 2013

My broken hip is a real nuisance and prevents me doing lots of things but I was not going to let it stop me from doing my Tim tag!!  I especially love this chalkboard technique that Tim taught us on Creative Chemistry 102 so I was pleased to see him using it for the November tag.

I don't have the leaf stamp that Tim used on his tag which you can see HERE.  I thought the technique would really suit the snowflake stamp from the Christmas Blueprints set. I thought it might help kick-start me into making some Christmas cards.....


I am not going to go through the whole technique because Tim explains it so well in his tutorial, but I stamped the snowflake onto the base tag and twice more onto black card.  I then fussy cut one whole snowflake and then the centre part of the second one.  I layered them up with silicone glue to give some dimension.


The sentiment was stamped onto black card and given the same chalkboard treatment, cut out and applied to the tag.  For some extra interest I added some of Tim's Remnant Rub snowflakes and to finish off I added an Ideaology 'Jingle' charm, a pearl and some sheer white ribbon.


I scruffed up the rest of the tag with the chalk to give a real chalkboard appearance.  Did I say how much I love this technique!  Here's another look at the finished tag.


Thanks so much for looking and thank you for your continued well wishes, it really does mean a lot and keeps my spirits lifted - you really are a remarkable tonic and a truly wonderful group of crafty friends.  Big hugs to you all,  Anne xxx

Friday, 15 November 2013

Steampunk Tic Tac Toe


Hello everyone, I am here today with my Design Team piece for Our Creative Corner.  My wonderfully talented team mate Claudia chose the theme this month, which is Steampunk Tic Tac Toe.  In Claudia's own words:

'So all you have to do is use three of the ingredients from the diagram that are in a straight line (horizontally, vertically or diagonally) when creating your projects for our challenge and name them in your post!'


I am a little out of my comfort zone with Steampunk but I do like a challenge so I chose the top line - wings, gears and wire and created a card.


The base card is 6" x 6" and I coloured it with Gathered Twigs Distress Ink.  The backing paper is from my stash. The watch is a Tim Holtz die which I cut several times from heavyweight card as I wanted the watch rim to be elevated.  The watch was coloured with several colours of Distress Paint to give a aged look. The wings are from another Tim Holtz die.  The wire on the left hand side is chicken wire from the DIY store and I have rusted it with Rust coloured Alcohol Ink.  The cogs are a mix of wood and metal cogs from my stash (in part a candy win from my blog friend Kath). The key and chain are also from my stash.  


I hope you will go over to Our Creative Corner to see the fantastic projects by my team mates, including our newest member, the amazing Astrid, I promise you will not be disappointed!  If you have not joined in yet, you have until the 28th November, we would really love to have you join in.

                *************************************************************

I have not posted much since my accident but I just wanted to let you know that I am making reasonably good progress, I still need to use the crutches for the next six weeks, which is a bit of a pain!  I have been totally overwhelmed by the messages, gifts, flowers and cards that I have received from my fabulous blog friends and I would like to say thank you from the bottom of my heart.  You really did lift my spirits when I needed it most.


I have been such a lucky girl!  The picture was taken last week, there are even more this week.  Thank you so much everyone.  Take care everyone and keep well.  Hugs, Anne xx


Monday, 4 November 2013

THANK YOU / UPDATE and Birthday/Halloween Accordion Card

The post below was scheduled but Mr Blogger did not do his duty so it is out of date by more than a week but I still wanted to show it for my friend Sandy and also bring you up to date and say thank you!

I wanted to send emails to everyone but there are just too many of you!  I am home from hospital now, my broken hip is starting to mend although I am under instruction not to put any weight on it or it will be a hip replacement for me .....not a pleasant thought so I am following Doctor's orders to the letter.

THANK YOU for all your messages, your kindness has overwhelmed me, I always knew my blog friends were wonderful but even you, dear friends, have gone above and beyond and I am not sure I will ever be able to repay you......... you will never know how much you all mean to me!

Thank you to Jenny, Mo and Lynn for spreading the word about my horrible accident.  Thank you to Jenny, Rita, Annie, Astrid, Brenda, Nicola, Terry, Sandy, Toni, Diane and Chris for the absolutely stunning flowers which arrived today (with chocolates too!).  Your kindness has warmed my heart and given me a much needed boost.

Thank you to Darnell, Claudia, Alison, Lynne, Mark, Rachel, May, Kelly, Carole, Kath, Patricia, Jennie, Laura, Julia, Linda, Amy and two Elaines, Di, Sue, Dianne, Jo Ann, Donna (and there are more that I have not read yet)........ for your kind and thoughtful words by email and on my blog.  I am so blessed to have such a wonderful group of friends and I treasure you all.  I will show all my beautiful cards when I feel a little better.

I am sorry that I will probably get behind again in looking at your blogs and commenting but as soon as I feel a bit more like myself I will be back stalking you all..........

           *****************************************************************

Now, below is a post which should have gone out on 26th October.............

It is the birthday of my lovely blog friend Sandy this week.  Sandy also loves Halloween so I took the opportunity to make an accordion card to cover both occasions.  Sandy has received her card and loved it.  I do not normally show cards that I have made for family and friends, but I know that Sandy will love seeing her card again here.

This is one side of the card - the birthday side.


I used mainly Tim Holtz items: the backing paper, the gorgeous Blueprint dragonfly and the wonderful mini Tattered Floral die, the Simple Sayings stamp set and of course his gorgeous paints to colour the flowers and the little square of burlap.

 The base card is made from Karen Burniston's fabulous Accordian base and frame dies (which I love!).


The Halloween side of the card again uses mainly Tim Holtz products: backing paper, the fabulous skull stamp and his Halloween die cuts, chit chat words and the Simple Sayings stamp set.  The orange colour in the background is Ripe Persimmon Distress Paint which is so perfect for Halloween makes.

I just love the way that this Accordion card can be made double sided, it is so versatile!

Thanks so much for looking, I look forward to catching up with you all soon.  Big hugs, Anne xx


Related Posts Plugin for WordPress, Blogger...

Labels