
Hello Friends
Another month has passed and it is my turn to share a project created for Belinda Basson's Stamperia Design Team. I had great fun creating some jewellery for Lady Vagabond to wear.
This first one is one of four pieces I created and I have to say it is my favourite (I do love dragonflies). I created a 'bust' to display them on, details of which I will share at the end of this post along with details of all the Stamperia products I used.

For this first one I used Belinda's Stamperia Keys & Locks Mould to create the key in resin. Once ready I covered the key in Cerantica Ancient Wax - Copper. I used some copper wire from my stash to fashion the wings of the dragonfly and backed these with Belinda's White Flowers Rice Paper. I attached the wings to the key with more copper wire, adding some decorative details to the key before hanging the dragonfly on a chain.
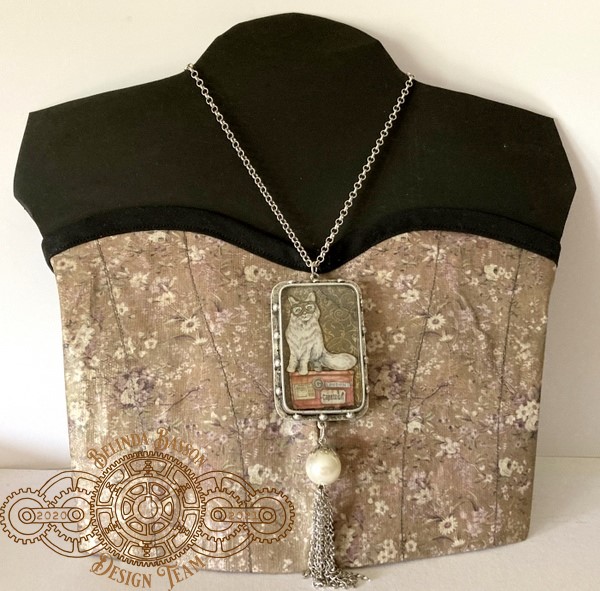
The second necklace was created using Belinda's Chipboard elements in the form of the cat and trunk. I placed these in a metal pendant from my stash and added Stamperia clear Crystal Resin to encapsulate the chipboard, and then added some chain elements to finish off.
(Note: before adding any chipboard or paper elements to a Resin piece they should be 'sealed' with a matte medium on all sides to prevent warping and discolouring once the Resin is added).

This third piece (above) was perhaps the easiest of all. I used Stamperia's Atelier Frames Mould to create the pendant from resin. Once set I applied Cerantica Ancient Wax in Turquoise and then added some Cerantica Metallic Silver to highlight areas. Lace was applied around the edge and I finished off the back with some plain card to hide the lace edges and the metal pendant fitting.

My final piece was created using a Sir Vagabond Greyboard Gear, simply painted in brown and then I added some large and small Stamperia metal gears and some chipboard clock faces. I added these to both sides of the pendant so that it looks finished from the front and the back.
Here is a view of all four necklaces:

For the bust stand I created a simple pattern from white card and then transferred this to heavy black card and cut it out.

I drew a bustier shape and cut this out in some calico fabric. I glued the Stamperia White Flowers Rice Paper to one side using some fabric glue from my stash and once dry I machine stitched some shaping into the bustier and finished the top off with some bias binding to give a neater finish and glued the whole piece to the card bust.
I hope Lady Vagabond will be pleased with her new jewellery!
Thanks so much for taking the time to visit, I really appreciate it and I hope it is not another full month before I post again. In the meantime take care and keep crafting!
Hugs, Anne xxx
STAMPERIA PRODUCTS USED
Stamperia Rice Paper - White Flowers DFSA3083
Stamperia Mould - Lady Vagabond Keys & Locks K3PTA485
Stamperia Mould - Atelier Frames K3PTA496
Stamperia Chipboard - Lady Vagabond DFLCB18
Stamperia A4 Greyboard - Sir Vagabond Gears & Clocks KLSPDA414
Stamperia Metal Gears - Assorted SBA406
Stamperia Metal Gears - Large SBA407
Cerantica Ancient Wax - Metallic Silver - K3P1S
Cerantica Ancient Wax - Turquoise - K3P15T
Cerantica Ancient Wax - Copper - K3P15R
Stamperia Crystal Resin - KEN13
