Pinterest

Wednesday, 16 March 2016

Paloma - Dove of Peace

Hello Friends

I am back, temporarily (sorry to say, we still have the horrible virus)  to share with you the next stop in Paloma's worldwide adventures.  For those who do not know Paloma, she was created by the lovely Lys of Impression Scrap.  After the horrid and tragic events in France last year, Lys created Paloma so that she could travel around the world and spread the message of peace.  This is what Lys had to say:

"After the shock, anger, nausea... what to say, what to do?
I have only the weapons made of paper and words....
I can face violence only with my value and beliefs.
Freedom and peace are the ones I wished to give today.
My little dove of simple paper
For her I make a wish: could she take flight,
And give all around the world her freedom and peace message"

Paloma came to me after visiting Sandy of Simply Sandy in the USA.  Previously she had visited two other special ladies, Sara Emily of Sarascloset and prior to that, Alison of Words and Pictures.

Lys asked us to photograph Paloma in a place that represents peace and freedom to us.  I showed you, a while back, some photographs of a shrine, up in the hills of the Peak District National Park, near where we live.  Whilst not religious myself, the shrine is so beautiful, it is always full of flowers and I always feel a certain calm when I visit it.  So here is Paloma, visiting the shrine on a really beautiful sunny, wintry day last week. 

First of all, a close up.
 View a little further away
A view of the whole shrine.
We had a bit of snow that day too, people had been sledging down the hill


Paloma is off on her travels again, taking her message of peace to another country, far away.  I will not spoil it by telling you who she has gone to, but she carries with her a little passport of her visits and a little gift for the next recipient. I hope you have a peaceful journey Paloma!

Thanks for your visit, I hope you are well.

Hugs, Anne xx


Note:
If anyone is interested in learning more about the shrine, my lovely friend Nicola (Paper Provision) did some research on it and you can find it here, thank you Nicola!:  http://www.derbyshireheritage.co.uk/Menu/Curiosities/shrine-to-the-blessed-virgin-mary.php


Tuesday, 8 March 2016

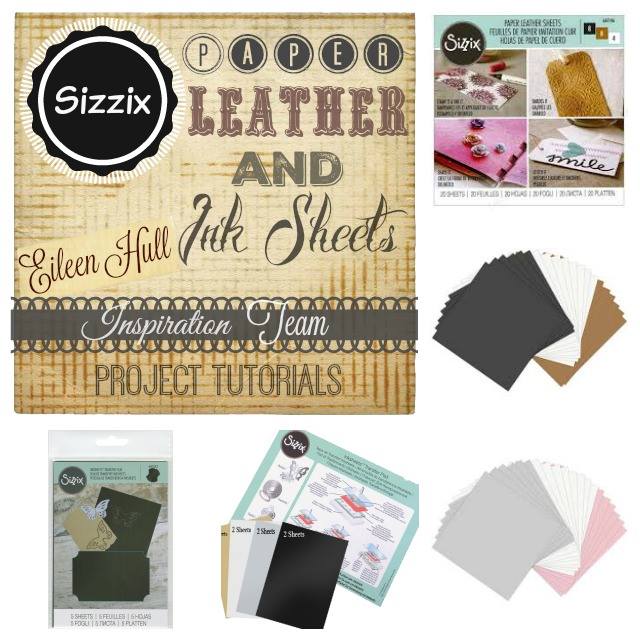
Sizzix Inksheets and Leather Paper Sheets

Eileen Hull has challenged her Inspiration Team to use the fabulous Sizzix Inksheets and Leather Paper Sheets.  I must admit I had never used either of them before but once I watched a couple of videos I was hooked!  Quite simply, the Inksheets can be used with any Embossing Folder to transfer the ink to the embossed area.  You can also use thin dies too and it turns the dies into stamps... how clever is that!  I decided to make his and hers keyrings using the Embossing technique.


The Leather Paper comes in a variety of colours and it is wonderfully strong, it will emboss and die cut beautifully.
To make my his and hers keyrings I used Eileen Hull's Needle Book die and two of Eileen's Embossing Folders - Leaves and Swirls and Sunburst.
In this pack of Leather Paper the colours are Pink, Grey and Cream and I used a black Inksheet.

I use a Big Shot Plus machine,   Once I die cut the Needle Book, I used the large platform and also the B Plate.  I put my cutting pad first, the embossing folder, the Ink sheet with the dull side toward the die cut, then the Leather Paper die cut, the top of the Embossing Folder and another small plate (mine are blue but yours will likely be clear. 
After embossing your piece the Inksheet transfers the pattern to your die cut, it looks just like you have stamped and embossed your pattern.  Just think of the possibilities!
I die cut some of the cream Leather Paper with the Needle Book die, and cut it down a fraction so it would fit with a little space so that the holder would fold easily.  I also die cut a second tab, glued one to the top and one to the side.  I also attached one of Tim Holtz fasteners to the front.  I then glued the cream insert to cover the tabs and fastener.
I used the same process to do the 'his' keyring, using the Sunburst Embossing Folder and a black Inksheet.

I die cut a black insert from black Leather Paper.  I love the look of the Sunburst EF on the Grey Leather Paper.  To finish off I used a couple of Tim Holtz punches, they cut beautifully through the Leather Paper, and added a key ring to each.
I will be honest, I didn't get it right first time but with a bit of perseverance it worked out beautifully in my opinion, they both have a wonderful 'distressed' look.

I look forward to experimenting more with these Leather Papers and Inksheets and I hope that you will have a go with them too.  You can also get an Inksheet Starter Kit, which gives you the plate you will need to use if you are 'die' stamping with the Inksheets.

My teamies have already and will be sharing more projects all this month if you want to check them out here and here.

As always, thanks for looking!

Hugs, Anne xx

Edited:  I scheduled this post a couple of days ago when I thought the virus was on it's way out, sadly, it is back with a vengeance, sincere apologies if I don't get round to visiting you over the next couple of days - sorry!  Hope you all stay virus free! xx

Saturday, 5 March 2016

Crazy for Colour !

Hello Everyone!

At Anything But Cute this month the wonderfully talented and lovely Branka is hosting our challenge, which is 'Crazy for Colour'.  To celebrate the Springtime we would like to see you create a mixed media project using Vibrant Colours.  It can be a tag, a card, an art journal page or anything else, just as long as you use vibrant colours!

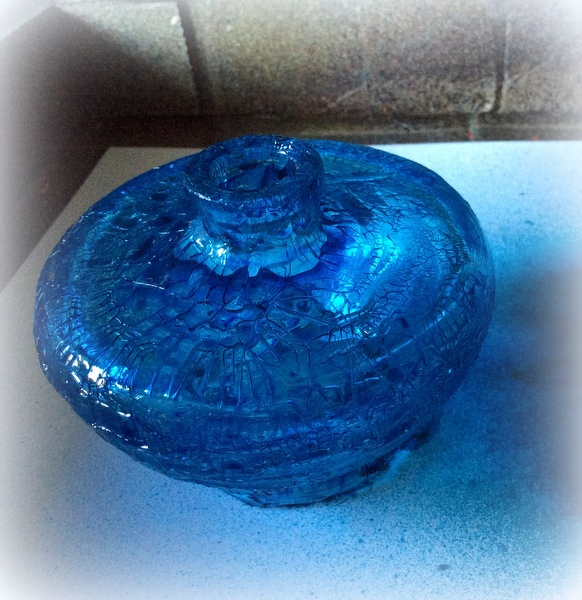
I decided to give an old air freshener bottle a make-over.


I absolutely love the 'faux crackled glass' technique that both Wendy Vecchi  and Tim Holtz use and I thought it would look beautiful using some vibrant colour!


The first step is to wash the glass well in soapy water, rinse and dry thoroughly - as any oil or dirt will affect the outcome.  Cover the whole piece evenly with Ranger Glue 'n' Seal (Matte).  Leave to dry naturally.

Coat well with Ranger Clear Rock Candy Distress Crackle Paint.  Try to make it a fairly even coat, you don't want big blobs of paint as these will be more likely to chip off later.  I find it best to leave this to dry overnight, I never use a heat tool when doing this technique.
When it is dry you should have some lovely big crackles!
Now for the fun part!  I use an old pizza box as a 'spray booth'.  This part is messy.
I used Mermaid Lagoon Distress Spray Stain (you can use alcohol inks too if you prefer) to cover the whole of the piece.  It doesn't look great when you first do it, the stain seems to 'pool' in some of the cracks but don't worry, it will look great when it is dry.  Leave it to dry naturally for a couple of hours at least.  Don't be tempted to use a heat tool, natural is best!
Next up is the flower.  I used a mixture of Red and Orange DecoArt Media Misters (the colours are really vibrant), mixing them in a separate bottle and I just sprayed the whole flower.  The flower came as part of the air freshener set and is made of a very lightweight material which took the colour beautifully!
Now, for the most important step (in my opinion).  I covered the glass with a coat of Ranger Glue 'n' Seal, this time in the gloss finish.   At this stage you will feel like your colour is lifting from the glass, Distress Stain is water based and will react with any liquid you put over the top, but just keep applying it in small gentle strokes.   I left it to dry thoroughly and then applied a second coat.  It gives the glass a lovely glossy sheen and it protects the crackle from chipping off.  I would not recommend washing the glass but a gentle dusting from time to time should not dislodge the crackles.
Another view of the finished pieces.
If you have not tried the technique before, I hope you will now!

So, if you feel inspired to go 'Crazy for Colour' then please do join us at Anything But Cute, we would love to see you join in Branka's wonderful challenge.

As always, thanks for looking and I hope to see you again soon!

Hugs, Anne xx

Friday, 4 March 2016

Indigoblu - Red is the Colour!

I was so thrilled to be in the Top 3 at Indigoblu with my Grungy Heart piece and then even more
thrilled when I was asked to do another project for their challenge blog HERE.

I am patiently waiting for my new Indigoblu flower stamps to arrive so I thought I would use the
very first Indigoblu stamp I purchased (Blazing Poppies), it must be 3 or 4 years ago and I think it is probably my most used stamp as it suits so many occasions.  The brief was to use red - so this stamp was just perfect for that!

It also gave me the chance to try out my new Tim Holtz Distress Crayons!
I stamped the image onto Watercolour Cardstock, with Ranger Black Archival Ink and then quickly added some Ranger Clear Embossing Powder and heat set it.
I took the advice that Tim gave to Jenny (Buttons) at Stitches - he said that 'Less is More' is not the way to play with the crayons - it is 'More is More'!!  I laid down loads of red and then used a water brush to move it out to the edges.  All I can say is, the crayons are simply lush and so easy to use!  For the yellow tinge in the background I put some of the Mustard Seed onto my little glass dish, added lots of water and created a 'wash' for my background.

To finish off, I dyed some vintage ribbon, made a messy bow and added a heart charm.  I added some layers of black and red card before attaching it to my white base card.

Thank you to the ladies at Indigoblu for giving me this opportunity, I absolutely love this stamp!

I would like to add this to the fabulous Darnell's NBUS Challenge #6.  My never before used items is my new Distress Crayons.

Thanks for looking, see you again tomorrow!

Hugs, Anne xx

Monday, 29 February 2016

Creative Carte Blanche - Something New

The wonderful Linda Ledbetter along with the Curiosity Crew ladies - Annette, Candy, Cheryl, Hels, Susan and Yvonne, have started up a new blog called
On the first Friday of each month the ladies will be posting a new creative adventure and for this first month they want us to try something new, something we have never done before....

I did this piece a couple of weeks ago and have been pondering as to whether
to show it or not, I am really not happy with it but, hey, I tried something new!

I have seen a few people using wax recently, in different ways.  I do have a melt pot gathering dust and some beeswax waiting to be opened but I wasn't sure about doing that.  I have had a box of children's crayons for ages in my stash, and I just thought..... I wonder if..... could I  just use the crayons and a heat tool and make something..... here is the result..... for better or worse...

I used a 6" x 6" wooden base and melted three different colours of blue crayon onto it.  Once it was covered I just heated the whole thing again until it was quite liquid and then left it to dry.  It only takes minutes to dry.


I do NOT recommend the next step but I took a large metal bodkin needle, heated it and picked up some green crayon and fashioned it into stalks.... it took a long time and it wasn't easy, but experimenting is fun!

Next, I held the heat gun over a red crayon and I just let the drops land wherever they wanted.  I did the same with the black centres, it was a bit trickier getting the blobs to go where I wanted them to...  To finish off, I flicked some white gesso over it to add some light here and there.

I know, I know, I am sorry, it is hardly a piece of art but I was pleased that I at least had a go at something completely different and it has made me want to get my melt pot out again, dust off the beeswax and have a go, perhaps, at creating a collage.  So thank you ladies at Creative Carte Blanche, I would never have tried using wax, without your prompt!

Thanks for looking, please don't feel you need to comment, it was purely an experiment!

Hugs, Anne xx

Thursday, 25 February 2016

Tim Tag February 2016

Hello Everyone

It is hard to believe that February is nearly over!  This is just a quick post to share my Tim Tag for February.  You can find Tim's wonderful original tag HERE.

While I am here, I would like to thank the DT at Indigo Blu for choosing my project here, in their Top 3, it is always so uplifting when others like your work!  Thank you ladies!


I wanted to use my new stencils to create my tag, I love the size of the new stencils, they fit perfectly onto a No. 8 Ranger tag.
I applied some Tea Dye Distress Stain to my tag first, as Tim did, to give a 'base' colour to work on.  I used the Monoprint Technique with the 'crosses' stencil and Distress Ink in Walnut Stain, Vintage Photo and Broken China.  It turned out a little darker than I wanted so I did not do an extra layer of stencilling on my version.

Using the 'word' stencil I applied Ranger Texture Paste followed by Ranger Copper Embossing Powder, following Tim's Embossed Texture Paste Technique, the Copper is a beautiful rich colour.

I chose and added my embellishments to finish off my tag.

Many of you know already, but I was incredibly lucky to see, meet and take a class with Tim Holtz at CHSI Stitches show this week.  I think you all know how much I love Tim and his products but after meeting him I have a new-found respect for the man.  He is just the nicest, kindest and friendliest people you could ever meet - such a talented and knowledgeable young man.  Mario is just adorable too, nothing was too much trouble for either of them.

We had a choice of projects to make, I just love the young man and his dog and I used 'time 4' to represent Time for Tim.  I have some wonderful memories of the day, not least of which was time spent with two of my crafting besties - Kath Stewart and Jenny (Buttons) Marples.
Kath, me, Jenny and the 'Professor' himself at the front.
And as if that was not enough, I went back on the Monday and visited Tim on his demo stand and he kindly posed with me for another photo, it was early and quiet and I had him all to myself for a whole demo, how lucky was I??

It was lovely to meet up with some of my AVJ Teamies too, Brenda Brown and Nikki Acton, DecoArt's Julia Stratford-Wright, the fabulous Andy Skinner, Nikki's lovely friend Cathryn, Enfys and Hina from Fiskars, the wonderfully talented Kassa Hayseldon, also, Kay, Alfie, Elizabeth and Cheremane, all from IndigoBlu.  I also got to meet the lovely Trish Latimer from Craft Stamper and Fran Seiford from Stampendous.  Apologies if I forgot anyone! Thank you to all of you for making the visit even more special!

If you have got this far, thanks for looking and I hope
to see you again soon!  Hugs, Anne xx

Wednesday, 24 February 2016

Two ways with one Stampendous Stamp set

All this week, Eileen Hull and Stampendous are having a week long blog hop called 'Along the Garden Path' and we were all given a stamp/die set to use.  I used the stamp set in two quite different ways, just to show their versatility.

For my first project I made a little cottage. 
The size of the door and windows lent themselves well to Eileen Hull's Artist Trading Block/Cube die (Sizzix 658984) - the middle size block was perfect as my base.  I used the block to measure out the size of the cottage.
After stamping the elements with Ranger Black Archival ink I then used DecoArt Media Fluid Acrylic paint in Titan Buff and Burnt Umber to colour the door and window frames. The bricks were coloured with English Red Oxide.
I cut the roof piece as shown.
Next, I coloured a piece of card with Paynes Grey paint and then stamped the small circle in rows.
I cut and trimmed each row of circles to form 'tiles' for the roof and glued these to my roof piece, adding a row of circles for the ridge piece on top of the roof.
To give some stability to the roof and also give me a place to glue the roof to, I added some cross pieces.

To finish off I stamped out the flowers and the picket fence, coloured these with Tim Holtz Distress Markers, fussy cut them and added them to my project.

Here is the stamp set that I used (Mushroom House 50317), I did not use the dies on this occasion.  Creating the cottage is probably the way the stamps were intended to be used but I made another quite different project.
Using Eileen Hull's Passport die (Sizzix 660331) I cut the cover from some card that I prepared using DecoArt Media Fluid Paints and Andy Skinner's Industrial stamp set.  
I took the two circles stamps from the Stampendous set and stamped using Black and White Gesso. I added some Tim Holtz chit chat stickers to finish off.
We hope you will join in the blog hop, there are prizes to be won!  You can check out this week's other posts from:


 Anne Redfern - that's me!


And finally, I had the pleasure of meeting the fabulous Fran Seiford of Stampendous at CHSI Stitches this week.  I am a great admirer of Fran's Frantage products and it was so lovely to meet her and get a signed copy of Fran's book - Embossing Powder Techniques from A to Z.

As always, thanks for looking, I hope to see you again soon!

Hugs, Anne xx


Related Posts Plugin for WordPress, Blogger...

Labels