Pinterest

Tuesday, 21 January 2014

Tag Holder for Tim Tags

Thank you so much for your positive comments on my Tim tag for January 2014, it gave me a much needed boost!

I have made (and blogged) my own style of tag holders in the past but when I saw Helen Allen's Tag Storage Project on her blog (HERE) I just had to buy the the plans from her Etsy shop and make one (well, two actually).  For that reason I will not be able to give you step by step details as to how I put this together but if you like it, please visit Helen's shop where she has many inspiring projects.  This project includes five full videos and over 20 pages of written text so it was very easy to follow.

This is the second one I made, I made a couple of mistakes on the first one in my haste to complete it and I am much happier with this one, if you click on the photos you can see a closer view:


Here it is empty, the front has a flap which folds down to get the tags in easier.  The pole at the top holds the tags, it comes apart at one end so that you can feed your tags through.  Helen designed it to take a standard No. 8 tag but the instructions include a holder for smaller tags too.


And here it is, full of my twelve 2013 tags.  The papers I used to cover the holder have a sewing theme so I added a charm holder with a sewing machine, scissors and a pretty birdcage.


This shows the end more clearly, I did both ends the same and I have added pretty little crystal  bead feet to the holder bottom.


Helen suggests displaying favourite tags at one end and this is one of my favourites from 2013.  I would not have been able to make it without my lovely blog friend, the very talented Brenda sending me the appropriate die cuts, thank you again Brenda!

This is the first one I made, with gorgeous papers from Maja Designs.  If you have not used Maja Design papers before I hope you will check them out, they are superb quality and the designs are gorgeous.  Linda Coughlin sells a large range and the Funkie Junkie Boutique and her postage rates are very reasonable.


Front view


End view showing the door opening


Filled with my 2012 Tim tags, the base on this one is slightly thinner than the other and I added some pretty blue beads for feet.


One of my favourite 2012 tags, added to one end.  I made this one slightly bigger than the norm so it will not fit in the holder, unfortunately!

I cannot tell you how much I enjoyed making these wonderful holders, they do take a few hours to make but they are worth every minute and it is a great way to display tags, they can be heavily embellished or left reasonably simple, like mine.  The next one will be with Tim Holtz papers for my 2014 tags.  Apologies for the photo heavy post but I hope you have enjoyed seeing the holders.

Take care, thanks so much for your visits and bigger thanks if you take the time to leave me a comment, I really do appreciate every one and always try to repay the compliment.  Big hugs,  Anne xx


Saturday, 18 January 2014

Tim Tag January 2014

Hi everyone and a big thank you to my new followers and also to those of you who regularly follow, I really do appreciate your kindness and support.  Apologies for not posting much lately and maybe not commenting as often as I usually do,  but I just can't seem to get into the 'groove' at the moment.  I have promised myself that I will use up lots of my stash (or NBUS, never before used stuff) as my lovely friend Darnell calls it!  I have also promised myself to spend more time crafting and a little less time blogging - but it's hard!

Anyway, on to my tag.  For once I had nearly everything that Tim used on his tag (yay, nothing new!) and in an attempt to kick-start my mojo I  followed Tim's technique closely to see if it would inspire me - and it did:


I am not going to take you through a step by step because Tim does it so well and my only differences are the words, the style of a couple of the cogs and the words on the ticket.


The little charm at the top was an absolute nightmare to do.  Tim suggested using a toothpick and he was not wrong!  It took me longer to do that charm than the rest of the tag - but it looks great now!


 I used the sentiment on the ticket, just because I love it.  I went a bit over the top with my splatting black paint as it even shows up on the ticket and I am not sure I was meant to.....but I like it.

Doing Tim's tag has helped with the mojo issue, as well as spending a wonderful day crafting with my lovely friend Mo, who always inspires me.  I have even made a tag holder today that looks a bit like a piece of home decor, so I may show that next week, because I am really pleased with it.

In the meantime, thanks so much for looking and I hope your weekend is going well.  See you soon!  Hugs, Anne xx

Thursday, 9 January 2014

New Year's Resolution

I try every year to make New Year Resolutions, but they don't tend to last very long so this year I am trying to be totally realistic, in making just one and then sticking to it.  My idea was inspired by Claudia who asked us to use up one of our shopping sins for Our Creative Corner - well that got me started, so my one and only resolution for this year is to 'USE IT' - use all that stash that I bought and intended to use but never did....

This project, which is my Design Team piece for Nicecrane,  uses some of my really beautiful and rather expensive Maja Design Vintage Autumn papers (up to now I could only stroke and then had to put them away again), flowers that I have had for several years, lace that I seem to have had forever and a die that my lovely friend Mo bought me about a year ago and has never been used until now.


The beautiful image is from Nicecrane Designs which you can purchase from HERE - Children in the Victorian Age IV CS.  Ignacio sells so many wonderful images, you will be spoiled for choice!


She is just so very beautiful!  I printed the image out in black and white and then coloured her bow, dress, flowers and cheeks in pale pink with Distress Markers.  They give a beautiful subtle colour on the glossy photo paper. I will add a sentiment if and when I send the card.

The papers were cut to size and distressed around the edges and lightly coloured with Spun Sugar Distress Ink.  A smaller piece frames the picture and the edges have been dipped into Embossing Ink and coated with White Frantage.


The leaves were die cut from scraps of the backing paper and the flowers are a selection from my stash.  The lace was edged with another piece of backing paper to create a little dimension.

Since I have made this card based on my New Year's Resolution I would like to join the challenge over at Frilly and Funky which is New Year's Resolutions and you need to create a vintage style project.  There is a £25 voucher for the winner to spend at The Funkie Junkie Boutique (where Linda's prices and delivery times are excellent) and an opportunity to be a Guest Designer.

I hope you are all having a good start to your New Year, thanks so much for having a look.  Hugs, Anne xx

Wednesday, 1 January 2014

Shopping Sins for Our Creative Corner

HAPPY NEW YEAR!!

I am back with my Design Team piece for Our Creative Corner.  Laura announced some exciting news about changes to the OCC blog so I hope you will pop over HERE to get all the details.

The wonderfully talented Claudia has chosen the theme this month which is 'No more shopping sins' and in Claudia's own words:

A popular pledge amongst crafters is ‘I will use up my stash’. Don’t we all have cupboards and shelves groaning under the weight of things we’ve bought and decided to save for a project that never happens? And then you feel guilty so you hide it under a new pile of (new) stuff!

This January I decided that it's the perfect time to finally get rid of that guilt. I challenge you to find one of your former ‘shopping sins’, open the packet, stroke it one last time, and then USE IT!

So bring out all of those treasured hoarded items that you feel guilty for buying and put them on show - and make your secretly gnawing scrapaholic's guilt go away. As simple as that ;)

I am a massive fan of Wendy Vecchi and I have many Art Part packages which are still unopened.  Yes, I admit it, I am a terrible hoarder but it really does take a lot to make me open the packages.......... well this month I have opened three!!  So it is a big thank you to Claudia!  I am going to try to do this more often this year........

I also used my favourite Wendy sentiment stamp and stencil and created this hanging:


The base is made from the Square and Rectangles Art Parts set and has been covered in Walnut Stain Distress Paint.  I stenciled over the frame with Wendy's Dots and Stripes Borders stencil and Potting Shed Archival Ink to give a light but defined border.


The sentiment was stamped onto cream cardstock with Ranger Black Archival ink and I used the same stencil to create a light pattern by using Antique Linen Distress stain.  I matched the pattern to the frame to give a more uniform appearance.


The leaf is from the Leaves Art Parts set, it has been coloured with Peeled Paint Distress Paint, over-stamped with the background stamp from Wendy's Love to Make Art set of stamps.  It was a bit bright so I dabbed some Potting Shed Archival ink here and there to grunge it up.

The flower is from the Florals Art Parts set, coloured with Fired Brick Distress Paint and over-stamped with
the same background stamp as above.  The top layer of the flower is made up from Clearly for Art attached to Frosted Film , coloured with Wendy's Red Geranium Archival ink, heated and shaped.  The beauty of the Clearly for Art is that if you are not happy you just re-heat it and shape it again - love that.  The centre of the flower has been stamped with the flower from the Art in Bloom set of stamps, then cut out and coloured with Dried Marigold Distress ink.

To finish the top of the hanging, I wound some rusted wire around a pokey tool, attached it to two Tim Holtz bull dog clips and added these to the top.

So, open up one of those 'shopping sins' packages, create something and join in the fun over at Our Creative Corner this month.  We would love to see you there!  In the meantime, please go over to have a look at what my very talented teamies have made this month, it is a real treat with lots of 'shopping sins' on display.

It just remains for me to say once again - HAPPY NEW YEAR to you and yours, hope 2014 is a fabulous year and that you find lots of time to create.  Big hugs,  Anne xx

Saturday, 28 December 2013

The most wonderful time..... and Mr Holtz

I hope you have all had a magical Christmas and are now looking forward to a wonderful New Year!  I was not going to post this project for reasons I will explain in a moment.  Mr Mojo took off on his holidays as soon as he knew I broke my hip and sadly, he has not been back much at all since!  The dilemma was, how do I create Christmas cards for family and friends without any inspiration.....

And along came Mr Holtz and his fabulous skate die which I had just purchased.  He posted THIS and I was inspired!  I did a tag card shamelessly copying his design to see if using his techniques would give me some ideas and it did.  Off I went making lots of cards and gift tags using the skate die (and this time using my own ideas!).  But they have all been given away to family and friends and I did not want to end the year without doing one more post...... so all I have left is this tag card and my leather look skate which I have already blogged.


The only differences between my tag and Tim's is the embossing folder I used and I added one of Tim's beautiful idea-ology ice skates and a brown ribbon bow at the top.  For details on the 'how to' please follow the link to Tim's blog.


This really is the most wonderful time of year, when family and friends come together to share the joy of Christmas and look forward to a new year.

Many people are showing their favourite makes for 2013 and what better way to round off the year.  I am just going to show you one, something that I am totally happy with (we are our own worst critics aren't we?), my Halloween Configurations box.   I followed the tutorial by the very talented Richele Christensen, it was an absolute delight to make and I won the most fantastic prize from Richele of guess what? - a bumper bundle of Tim Holtz goodies so I have plenty to play with next year..........  I am linking this up with Jennie the Artistic Stamper HERE who is asking us to show our favourite piece from this year.  You can find my original piece here.


 I have a lot to thank Tim Holtz for and long may it continue, despite it making me rather poor most months!

And finally, it would take me forever to thank people for their kindness this year, so I just want to say a very big thank you to all my friends and followers who were kind enough to visit my blog and leave comments, those who sent me well wishes, beautiful cards, wonderful gifts and most of all, those who shared friendship.  I am truly thankful for each and every one of you so THANK YOU!

I wish you and yours all the very best for 2014 and hope that it is happy and healthy and that you get lots of time to create your own forms of art.  Big hugs, Anne xx
Tuesday, 17 December 2013

Tim Tag December 2013 and something different

Tim's tag for December is, I think, my most favourite one this year.  I cannot think of a better marriage than Tim's Frosted Film and Wendy Vecchi's Clearly for Art!  This tag was such fun and the resulting flower is just stunning.  To see Tim's original you can go HERE.

Without further ado, here is my effort:


I actually loved Tim's tag so much that I didn't want to do anything different, although sadly, I do not yet have the sentiment stamp that Tim used and I did improvise by using a Stampendous stamp.  Other than that I followed Tim's tutorial exactly.  If you want further details then please have a look at Tim's link above.

Here is a close up of the gorgeous flower and you can just see a hint of the stencilling I did in the background, using Tim's star stencil.

                                         ***********************************
And now for something a little different.  I think you know how much I love using Tim's new skate die, I have made lots of cards with it this year and will never tire of using it.  My lovely blog friend Angela (if you have not looked at her blog before, I hope you will, she is a very talented lady) put a note on my blog telling me of some Dutch friends she has, who have a very old pair of brown leather skates.  Well that got 'the little grey cells' awakened and then they went into overdrive!  I don't have any leather but I do have a pack of Tim's Kraft Glassine so I did some experimenting and this is the result (click on the photos for a closer look):


I did a couple of attempts which did not work, the Kraft Glassine on it's own is not strong enough to put laces through so I used some double sided adhesive sheets.  I screwed up and crumpled up the Glassine, put some double sided adhesive sheets on the back and then attached this to some Kraft card stock and bingo - it was strong enough to take the laces.

I used a white base card, matted and layered with some more Kraft card.  The top layer is some patterned paper from my stash and I randomly stencilled over the top with Tim's Dot Fade stencil.  I added the Merry Christmas from the Simple Sayings stamp set and some greenery in the corner from the Festive Greenery strip die.


To make the heel and the blade of the skate I did this on white card, coloured the heel with Wendy Vecchi Potting Soil Archival ink (my current favourite) and covered the blade with Treasure Gold in Pewter.

To age the faux leather of the skates I took a piece of cut and dry foam and randomly brushed Potting Soil Archival ink over the skate.  I am really pleased with the result, in real life it does look like aged leather.

Thank you for looking and in the event that I do not post again before Christmas, I would like to wish you all a Merry Christmas and a very happy and healthy New Year!  Thank you all for being such wonderful and caring and supportive blog friends.  Big hugs, Anne xxx


Sunday, 15 December 2013

A Very Vintage Christmas

This month, over at Our Creative Corner, the lovely Laura has chosen the challenge theme which is 'A Very Vintage Christmas'.  In Laura's own words:

For this challenge we are abandoning traditional Christmas colours and are giving Christmas a Vintage tone.  No reds, no greens, just neutrals.

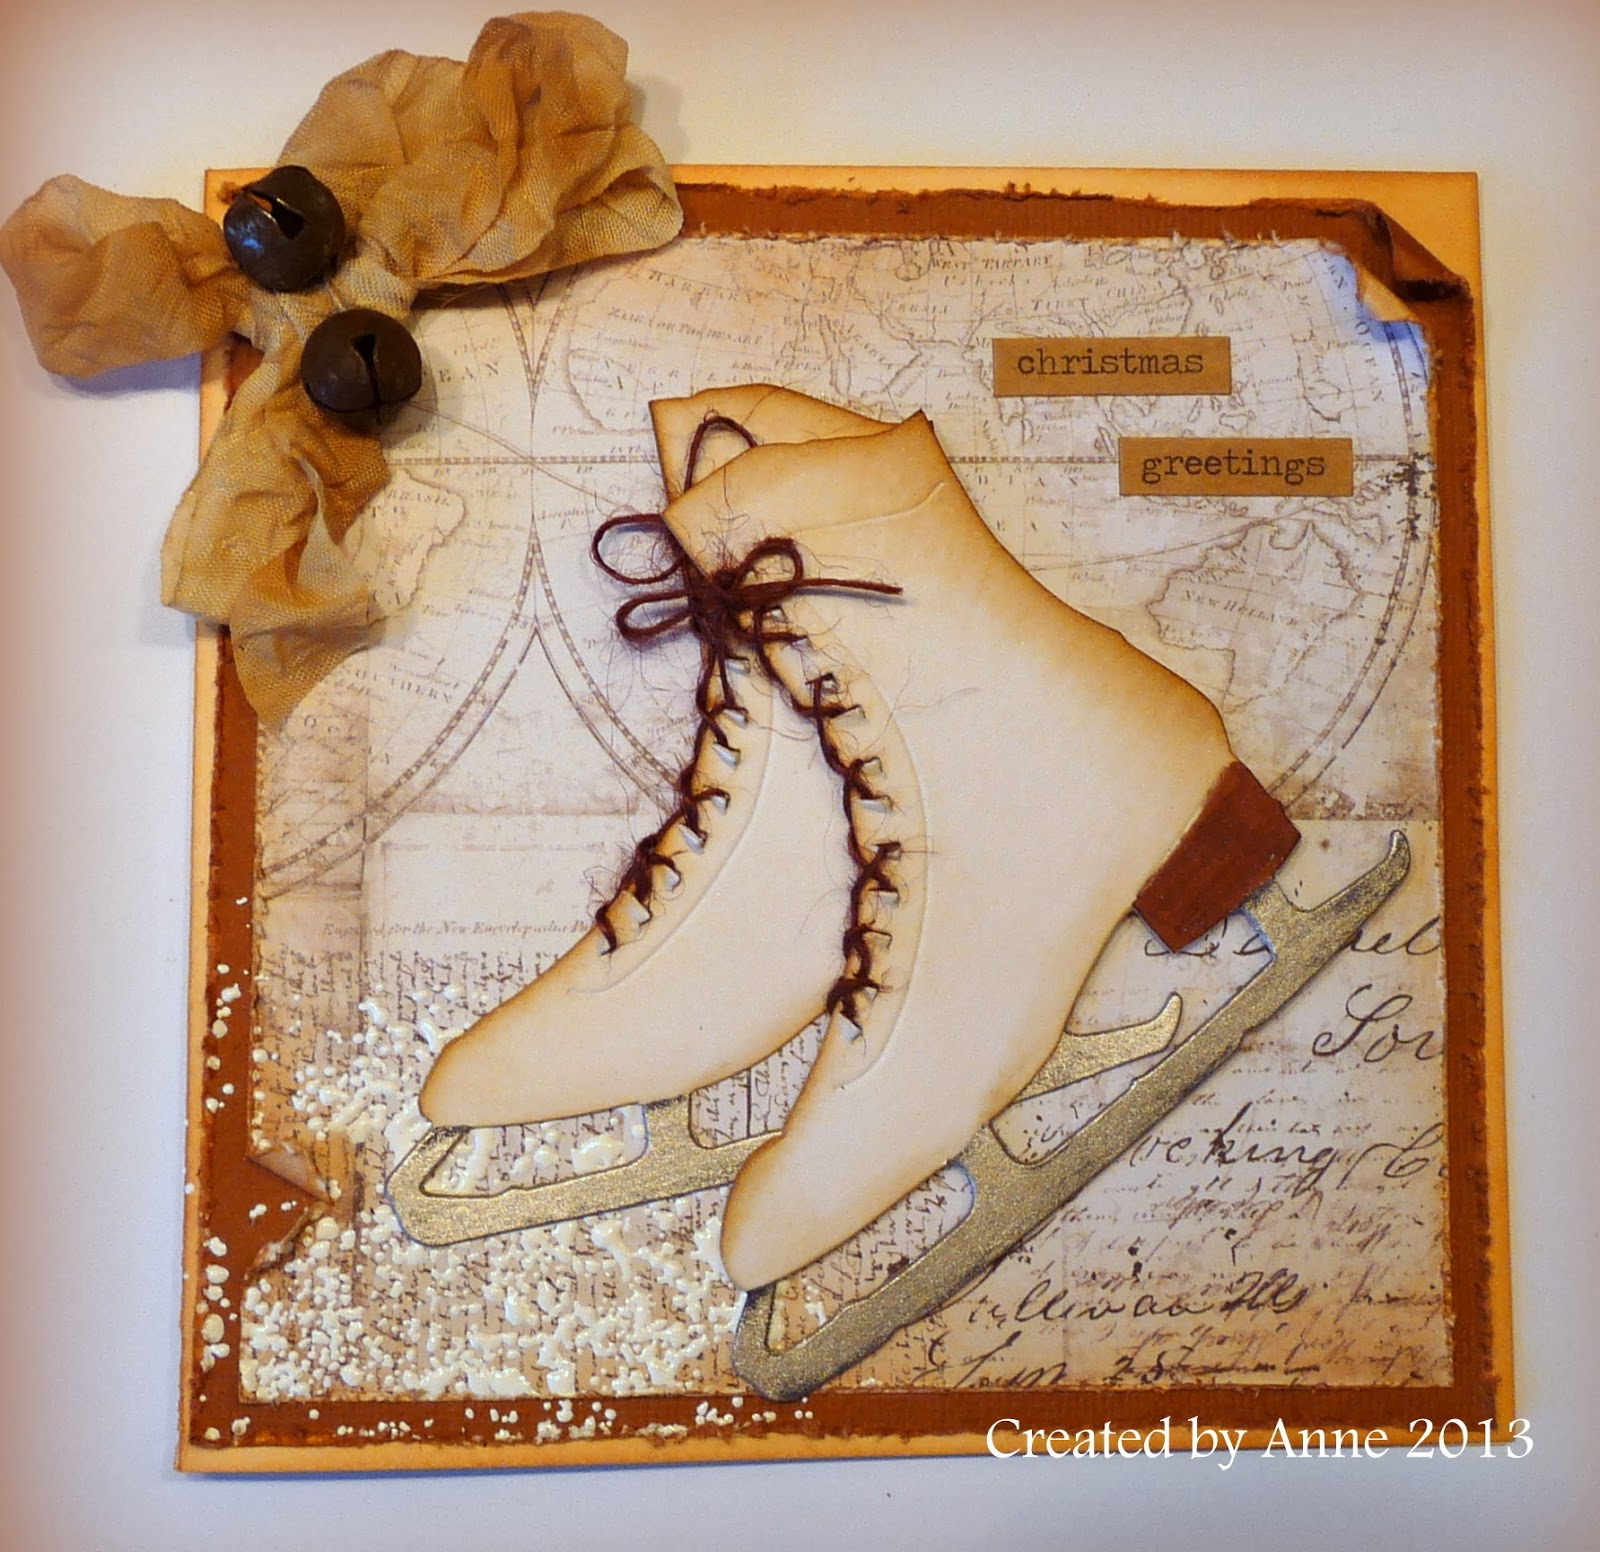
Quite the challenge for me, I don't do either neutral or vintage very well but once I started I actually loved it!  I was able to use my new (and current favourite) ice skate die by Tim Holtz to make a Christmas card.  I liked it so much I made a few.  For a closer view just click on the photos.


The base is a 6" x 6" square white card which I coloured with Tea Dye Distress Ink.  I then matted two layers, one in Frayed Burlap core'dinations card and one in a rustic map design paper from my stash.  The edges were roughed up and coloured with Tea Dye DI.  I added some Frantage to the bottom corner to give the appearance of snow or ice.  The sentiment is from Tim's Seasonal chit chat stickers, part of a huge parcel of Tim goodies that I won from Richele Christensen for my Halloween Configurations Box.  She knows me well and my obsession with Mr Holtz's products, it seems!


I inked the edges of the skates to give them a vintage feel.  The beauty of this skate die is that it has little holes in it where you can actually add laces.  The laces are made from some twine and the blades have been coloured using Treasure Gold in Pewter.  I dabbed this on with a paint brush, again to give a mottled and aged appearance.


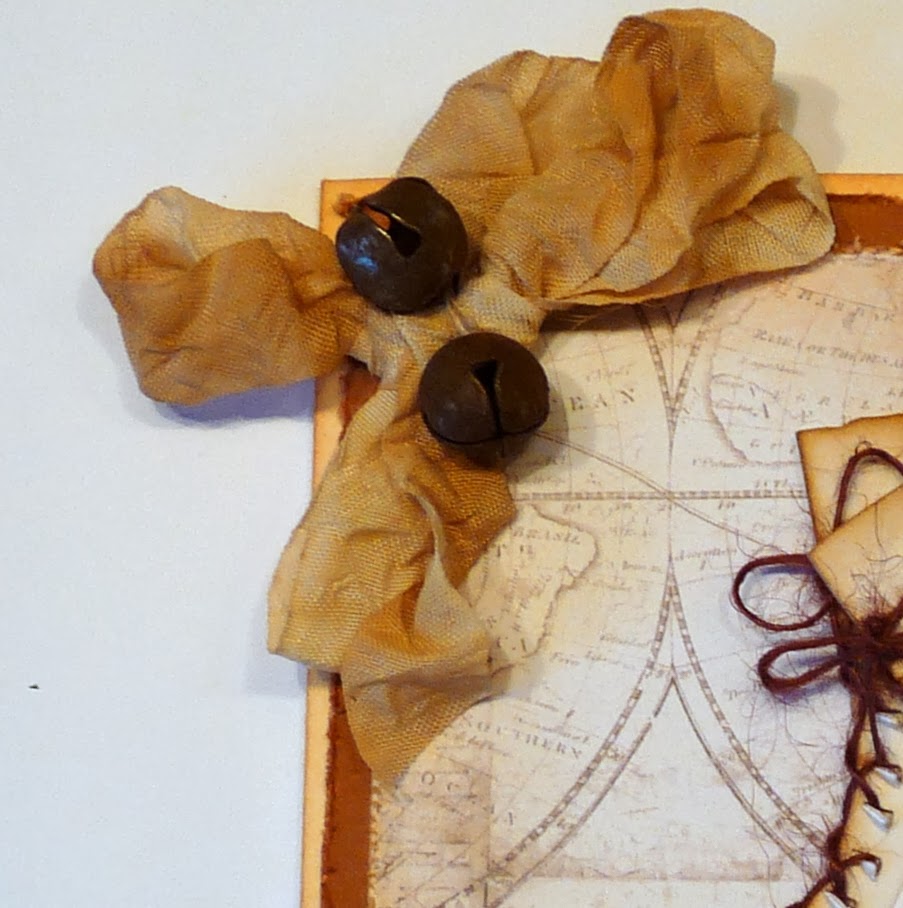
At the top I added some vintage ribbon which was coloured quite randomly with Tea Dye DI and the fabulous rusty jingle bells.

We would love you to join in the challenge at Our Creative Corner, there is still time, the challenge closes on 28 December 2013.  Please have a look over HERE for full details of the challenge.  I hope you will go over here and visit to see what my other teamies have made - I promise you will not be disappointed!

I would like to say a huge thank you to my long standing followers and also to my new ones, it is so lovely to have you along on my creative journey.  I really do appreciate all of you!  As some of you know I have recently been a bit indisposed and Mr Mojo went on his holidays around the same time, but I hope to get back to creating and blogging a little more often in the new year.  I will be back soon though with my Tim Tag for December, I could not end the year without completing the last one. Hope to see you then.

Edited:  I intended to link this up to Country View Crafts challenge blog where the theme is Bah Humbug and there is a fabulous prize of £20 to spend in the shop or a place on Brenda Brown's workshop!

Big hugs,  Anne x x
Related Posts Plugin for WordPress, Blogger...

Labels