Pinterest

Wednesday, 18 December 2019

Merry Christmas for AALL & Create

Hello Friends

Since Christmas is just around the corner and this is my last official 2019 post as Guest Designer for AALL & Create  (I will be back next year though!), I wanted to see if I could create a Christmas card.  Since AALL & Create do not do seasonal stamps I found one, by Tracy Evans, that I thought would make a poinsettia to complete my task!
I started by creating my background, brayering paint randomly onto white heavy card.  I wasn't looking for traditional colours but I had to get red in there!
Next, I turned to the poinsettia.  I used Tracy's gorgeous Blossomed Numbers stamp set #109 and stamped onto Clearly for Art, an acetate type film that moulds with heat.  I used Stazon to stamp with.
I used alcohol ink to colour the stamped images, stamping on the reverse side of the film.  Once dry I fussy cut the flowers (and two leaves).
I heat moulded the flower and then assembled it, adding some stamens from my stash to the middle.  I just love the shape of the flower!
 I added some stenciling using Olga Heldwein's Rota Vitae stencil #49 using white texture paste which I coated with white embossing powder, left it to dry and then heat embossed it.  I finished off by stamping Merry Christmas and then added this to my card.
A full list of worldwide stockists of AALL & Create, stamps, stencils and dies is available HERE.

I wish you and your families a very Merry Christmas and very best wishes
for 2020!

Hugs, Anne xx


Wednesday, 11 December 2019

Address Book/Phone Book cover for AALL & Create

Hello Friends

Firstly, I apologise if I have not visited you over the last week, I have not had much internet time and had a couple of days away, I will try to catch up soon.

My Guest Designer project for AALL & Create this week uses Bipasha BK's Phonebooth Elements stamp set (#237) and the Numbers stencil (#30) by Autour de Mwa and I created a cover for a plain address/phone book.
I started by cutting a piece of cotton fabric a few inches larger than the address book (a cheap purchase from a local stationers).  I dampened the fabric well and then used good quality fabric paint to colour the whole piece.
I stamped the post box first, masked it off and then stamped the phone box over the top as I wanted the phonebox to be in the background.  I used Versacraft pigment ink for my stamping.
I painted the elements and left this overnight to dry.
I wanted to add some texture to the cover and I used the Numbers stencil by Autour de Mwa and the same colour of paint.
I wanted the cover to be removable and stitched it as shown below.  It fits beautifully over the plain book and is not too bulky. 
Here is a view of the finished back.
You can find a list of worldwide stockists HERE on the AALL & Create website.

Thanks so much for your visit, I really appreciate it, I hope to see you again soon.

Hugs, Anne xx

Wednesday, 4 December 2019

Brush Flower for AALL & Create

Hello Friends

It is time of the week when I share my Guest Designer project for AALL & Create.  This week I used a canvas board, two of Tracy Evans' Latest Release stamps - Brush Flower #234, All Measured Up #235 and Lotza Dotz stencil #39 by Autour de Mwa.
I used a 5" x 7" mixed media canvas board for the base to create my three dimensional project. I started by brayering two colours of acrylic paint over the canvas and then applied a layer of gesso.
I applied some crackle paste through the Lotza Dotz to opposite sides of the canvas.  I stamped the brush flower directly onto the canvas using Black Versafine Clair ink.
To give the flower dimension, I stamped the flower again onto Ranger Clearly For Art, coloured on the back with an alcohol pen and then fussy cut the flower before heating it and molding it into the shape I was happy with.
I attached the molded flower to the canvas with Glossy Accents.  I also added some further stamping here and there using the second stamp in set #234, stamping them in acrylic paint.
Finally, I stamped Tracy's All Measured Up stamp onto some white card and cut a couple of strips, which I then coloured with Distress Ink and added them to the bottom of the canvas.
You can see a full list of worldwide stockists of the stamps and stencil I used HERE, although  AALL & Create do advocate people purchasing their products from local stockists wherever possible.

Thanks so much for your visit, I really appreciate you taking the time and I hope
to see you again soon.

Hugs, Anne xxx

Sunday, 1 December 2019

Christmas Planner for Mini Album Makers

Hello Friends

The first of the month means it is time for a new challenge over at Mini Album Makers!  Our rules are quite simple,  you can find all the details here.

I love planning for Christmas, and even though I seem to do less and less each year I still like to make a planner to keep Christmas gift ideas, and my all important card checklist.

I started by cutting black mountboard/matboard to 7.1/4" x 7.1/4" for the covers and 7.1/4" x 1.1/4" for the spine.  I used tape to join the three pieces together as shown below.
Next, I added a Tim Holtz ring binder.  It is best to do this before decorating the outside as the pins will not show then.
I used a (very old) Sizzix die to cut tab dividers for the inside of the planner and then cut lots of ruled pages to go inside each of the dividers.  I have not decided how to decorate them as yet...
Using some brick paper from my stash, I covered the front, side and spine.
 I 'built' the snowman using Tim Holtz's fabulous new Colorize Mr Snowman (Sizzix 664230) and used Tim's Wreath & Snowflake die by Sizzix (664210) to create the wreath.
For the door I cut up some greyboard to create the door frame and the door and then gessoed the pieces in black.
I wanted the door to be bright red so I painted it with DecoArt paint in Pyrole Red.  For the frame over the door I used one of Tim Holtz's On the Edge die (Sizzix 656628).  I also created a 'step' for the door using brick design paper from my stash.
All that remained was to add some Idea-ology pieces, over the door and the number 25 and finally some 'snow' to give a wintry feel.
So, there we have it, I am all set up now to get my Christmas plans underway!

Our lovely Sponsor this month is:
 Lindy's Stamp Gang who are offering a  $25 Gift Voucher to one lucky winner.

Website - https://www.lindysgang.com/
Blog - https://lindysgang.blog/
YouTube - https://www.youtube.com/user/lindysgang/


We would love it if you could join us over at Mini Album Makers this month.

Thanks so much for your visit, I hope to see you again soon.

Hugs, Anne xx

Wednesday, 27 November 2019

Blooming Field #2 for AALL & Create

Hello Friends

I am back with my Guest Design project for AALL & Create.  I have created a mixed media piece, using Olga Heldwein's Blooming Field stamp set again, along with stencil #38, also by Olga.
I had a piece of cardboard from a recent delivery that I thought was too good to throw away.
I removed some of the top layer and then covered the whole piece with gesso.
I added some blue paint over the gesso and then applied crackle paste both directly here and there and also through stencil #38 (a gift from my lovely friend Jo Rice).  I applied the same blue paint to the edges of a further piece of board.  The cardboard itself is not strong enough on its own to provide a sturdy base.
To add some further texture I stamped #125 by Aida Domisiewicz randomly over the base. 
I wanted a frame for the flowers, this one was in my stash, with some texture already, so I painted over with blue paint.
I stamped the flowers onto watercolour cardstock and coloured them with watercolour pencils, then fussy cut each one (there is now a set of dies available to do this but I did not have this at the time of making this project).
 I assembled the flowers onto the frame.  The largest flower was layered up to give some extra dimension.  Finally, I added the sentiment to complete my project.

All of the stamps and stencils I used are available from AALL & Create HERE, where you will also find a list of worldwide stockists.  AALL & Create do encourage you to buy from your local stockist wherever possible.


Wednesday, 20 November 2019

Cat Love, New Release for AALL & Create

Hello Friends

I am back again with another of AALL & Create's new release and this time I have created an accordion card using 'Cat Love' by Janet Klein for AALL & Create (#256) along with Stencil #19 by Autour de Mwa.

The image is so quirky and I just adore her cat!  Cutesy is way out of my comfort zone so I thought I would compensate and create something a bit more than just a standard card.  I used Karen Burniston's Accordion die set by Sizzix to create a single accordion fold card.  I think it shows her of quite well.....

I die cut the elements using Watercolour cardstock.
I brayered paint onto the front and back of the die cut elements and stamped
the images onto the separate die cut pieces.
Next, I used embossing paste to stencil the top and bottom of each of the frames.  Once the paste was dry I applied a light coat of Distress Oxide to blend the stencil in on the front and I stencilled the back of the frames directly onto the frame with Distress Oxide.
I watercoloured all of the images, after stamping an extra set,  fussy cut these and added them over the original images to give them some dimension.  I 'grounded' the girl and cat by adding some ripped washi tape.  I added a sparkly bow to her hair.
I stamped the sentiment and added it to the opposite side of the accordion.  This is a view of the card, closed and from the back.
This is a view of the finished card, closed, from the front.
If you are interested in purchasing the stamp and stencil you can find a list of worldwide stockists HERE.

Thanks so much for your visit, I really appreciate it!

Hugs, Anne xx

Wednesday, 13 November 2019

Blooming Field New Release by AALL & Create

Hello Friends

I am back this week with a Guest Designer piece for AALL & Create, using Olga Heldwein's newly released (and gorgeous) stamp set #229 - Blooming Field.
I created a simple notebook/journal.  I had intended to create a small hard back journal but I could not bring myself to cut into the image, I wanted to show the whole stamp.
Here is the stamp set - isn't it beautiful, along with the stencil I used lightly in the background, #64 by Autour de Mwa.
The image was stamped onto mixed media card, with Black Versafine Clair ink.
I coloured the image with Derwent Inktense Watercolour pencils.  Olga provides the shading in her stamps so the images are so easy to colour!
I masked off the image and used Distress Oxide Ink in Broken China to colour in my background area.  Once coloured I applied the stencil and coloured again using the same Oxide ink and it left a 'ghosted' image in the background.  I applied the image to my 6" x 8.1/4" notebook, trimmed around the edges and then added more Oxide ink to the edges.

To finish off I added an elastic closure in a toning blue.  This notebook/journal will sit on my desk to jot ideas and techniques down.

You can find a list of worldwide stockists of AALL & Create stamps and stencils  HERE.

Thanks so much for your visit, it is always appreciated!

Hugs, Anne xxx


Wednesday, 6 November 2019

Mermaid/Octopus New Release by AALL & Create

Hello Friends

I am back this week with my Guest Designer project for AALL & Create.  Even though we are nearer to Christmas than summer I really wanted to use the fabulous newly released OctoMermaid Stamp Set #236 by Olga Heldwein to create and underwater scene.
I stamped the image onto mixed media paper and used watercolour pencils to colour her.
After colouring her I fussy cut her out and set her to one side.
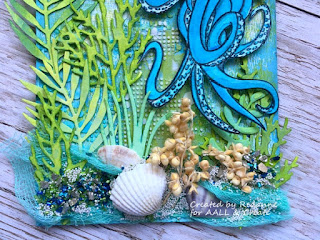
I turned my attention to the tag base.  I cut the tag from mount board and brayered some turquoise and green paint onto the base before brayering a thin coat of gesso to tone it down.  Using the Lotza Dotz Stencil #39 (by Autour de Mwa for AALL & Create) and Texture Paste  I applied this to the tag. I love the way the paint has seeped through the Texture Paste in many places.
Some greenery was added and a few other pieces, including some sparkly stars (which sadly don't show up very well) from my stash to create an underwater scene.
I used the sentiment from the same stamp set and added this to my tag to finish it off.  As you can see I also covered her modesty! LOL.
Here is another closeup of Olga's beautiful underwater creature.


If you would like to buy this stamp and/or stencil or any other AALL & Create products, you can find a full list of worldwide stockists HERE.

Thanks so much for your visit, they are always appreciated!

Hugs, Anne xx

Related Posts Plugin for WordPress, Blogger...

Labels