Pinterest

Monday, 20 August 2018

Simon Says Stamp - Designer Spotlight - Week 3

Hello Friends

This is my third week in the Spotlight at Simon Says Stamp Monday Challenge.
It is time for a new challenge and that challenge is 'Back to School'.


For my 'Back to School' project I created a Homework/study desk tidy using one of my favourite Eileen Hull dies - the versatile Card Box, Planner Storage and Organiser, along with Dina Wakley Heavy Body Paint, a Dina Wakley stencil, AALLandCreate stencil #28 and stamp #13.


I started by die cutting the Card Box, Planner Storage & Organiser from mount board, cutting two for my double storage box.
I used a brayer to add Dina Wakley Heavy Body paint (Ruby and Turquoise) directly to the mount board.  The paint was applied to one side only of both die cuts, as they were going to be glued together in the middle.

I applied Dina Wakley's stencil - Jumbled Numbers to one half of both of the painted die cuts, using Tim Holtz Distress Paint (Black Soot) applied with a blending tool.  I used a white Signo pen to highlight some of the numbers.

The insides of the die cuts were painted in Dina's Turquoise paint, applied with a brayer (not shown).

I assembled the boxes and joined two together back to back.
To create the notebook I brayered some more card using the same paints as before.  I think I might be slightly addicted to this type of painting.
I used AALLandCreate Stencil #28 and Black Embossing Paste on the cover.
The bookmark was stamped using AALLandCreate Stamp #13.  I attached the covers of the notebook with rings so that the Study Notes can lay flat.  The notebook fits nicely in the organiser.

Products available from Simon Says Stamp:
Eileen Hull - Sizzix 662361 - Card Box, Planner Storage and Organiser
Dina Wakley Heavy Body Paint
Dina Wakley Stencil - Jumbled Numbers
AALLandCreate Stencil #28
AALLandCreate Stamp #13
Tim Holtz Distress Paint - Black Soot
White Ini-ball Pen Signo Gel

Each week there is a fabulous $50 gift voucher on offer!

All the of the products that I used, which are available from Simon Says Stamp 
are listed above.

I do hope you will visit Simon Says Monday Challenge to see what the talented designers there have made for this challenge, I am in constant awe of their talents.

As always, thank you for your visit, I hope to see you again soon!

Hugs, Anne xx

Friday, 17 August 2018

Red Leather Wrapped Journal - for Eileen Hull

Hello Friends

During August, Eileen Hull's Inspiration Team are sharing some of their favourites of Eileen's dies.  I have to admit my favourite changes as soon as Eileen brings out a new set of dies!  My current favourite is Eileen's Wrapped Journal die - Sizzix 662816, which I have used with another favourite - Tim Holtz fabric and beautiful soft red Leather...
I have kept it quite plain on the outside, but it is not quite so plain inside!  I will take you through a few of the steps, this is such an easy journal to make...
1)  I buy quite large pieces of leather and so I always cut down the leather with a sharp knife, so it fits the size of the die better.  This leather is very soft so I took extra care. I attached the leather to a piece of mount board and left it overnight to thoroughly dry, before cutting with the journal die.

2)  I chose one of my favourite Tim Holtz fabrics for the inside.

3)  I glued the fabric to the inside of the die cut journal with Multi Medium and let it dry.  Once dry, carefully cut around the journal, cropping the fabric close to the journal.  If you are worried about edges fraying, just use your finger to apply some Multi Medium around all the edges.

4)  I used a harlequin pattern embossing folder that had a repeating pattern and embossed the whole of the journal.  You need to be careful when embossing leather, always try it out on a spare piece of leather, experimenting with the plates in your die cutting machine to get the right emboss.
You can, of course, emboss the leather before you add the fabric, but I prefer to do it after attaching the fabric, it seems to create a better 'bond'.
I like to add a pen to my journals, as I can never find one when I need one!
5)  Take a piece of card, to fit the spine that does not have the string holes in it and wrap it in your chosen fabric.  Take a length of 1 inch elastic and hand or machine stitch the elastic about one third of the way across the covered card.
6)  Place your pen on the card so that you will stitch the other side in the right place, mark it, remove the pen and stitch.
7)  Cut the ends of the elastic off, seal the edges with Matte Medium.
8)  Glue the piece in place along the spine and leave to dry thoroughly.
Create your signatures.  I used the remains of the fabric to cover card measuring 7.1/4" x 4.7/8" and fill with paper of your choice.
String the journal with elastic of your choice.  Eileen shared a video HERE (the stringing sections starts around 54 minutes in) showing a simple way to string the journal so that it will take up to six signatures.
Here is a view of the completed inside.  I added a button to the front and added a simple elastic closure on the front inside flap.
A final look at the completed journal, it is really soft and tactile!  I added a couple of charms to the side for decoration.

Thanks for your visit, I hope you will keep an eye on Eileen's blog HERE, where my talented team mates will be sharing some of their favourite dies this month!

I will be back again on Monday with my Simon Says Stamp project, which also uses one of my favourite Eileen Hull dies.... hope to see you then!

Hugs, Anne xx

Monday, 13 August 2018

Simon Says Stamp - Designer Spotlight - Week 2

Hello Friends

I am still pinching myself!  This is week 2 and my second project in the Designer Spotlight at Simon Says Stamp Monday Challenge!  Thank you so much for the lovely comments last week, both here and on Facebook, I really do appreciate it!
The new challenge for this week is 'Sprinkles and Splatters'.
'

 I went all grungy, using products by AALLandCreate, Tim Holtz, Dina Wakley and Ranger.

I gathered up all the products I wanted to use, those products available from Simon Says Stamp are listed further down below, with links.
I love the Tim Holtz Etcetera Tags, they take a lot of product!
After stencilling on the tag with Ranger texture paste I painted the whole tag with Turquoise paint and left it to dry.  I added a coat of Distress Paint over the whole tag and wiped some off straight away with a damp cloth, removing paint until I was happy with the background - a technique I learned from my friend Tracy Evans.  It really highlights the embossing and tones down the turquoise colour somewhat.

The products I used from Simon Says Stamp are listed below.
AALLandCreate #45
Tim Holtz Etcetera Tag - Mini
Dina Wakley Acrylic Paint - Turquoise
Tim Holtz Distress Paint - Vintage Photo
Ranger Texture Paste
Ranger Embossing Powder - Copper
Ranger Distress Crayons
Ranger Crackle Accents


To create the magnifying glass I used AALLandCreate Stamp #64.  After stamping I fussy cut it and used Ranger Embossing Powder in Copper and then Tim Holtz Distress Embossing Powder in Vintage Photo before touching it up with Distress Markers in Rusty Hinge and Vintage Photo.
The butterfly is from AALLandCreate set #45, I cut it out and painted it with Dina Wakley paint and then overstamped with the script stamp from Set #64.  I used the same stamp to randomly stamp on the tag itself.  I cut some corrugated card, added a couple of layers of patterned paper, stamped the 'look deeper' element from set #64 and added the stamped magnifying glass over.  I added some Crackle Accents to create the 'glass'.

For my 'Sprinkles and Splatters' element I added some tiny beads from my stash (make unknown)  at the bottom and I splattered lots of paint over the whole tag.
I added some rusty wire and crinkle ribbon from my stash to the top of the tag.

When I create these larger tags I do like to add a hanging embellishment so to finish off. I added a vintage magnifying glass which I 'rusted' in the same way as the magnifying glass on the tag itself.
It would be lovely to have you join in this week 
Each week there is a fabulous $50 gift voucher on offer!

All the of the products that I used, which are available from Simon Says Stamp 
are listed above.
Thanks so much for your visit, I hope you will visit the challenge blog to see the wonderful creations that the talented Design Team have made too, you will not be disappointed!

Hugs, Anne xx

Monday, 6 August 2018

Simon Says Stamp - Designer Spotlight

Hello Friends!

I am so thrilled and honoured that Simon Says Stamp Monday Challenge has asked me to be in the Designer Spotlight for August!  The whole team is amazing and I am so pleased to be working alongside them again.   How fabulous is that!  Huge thanks to the team for this opportunity.

The first challenge for August is 'Tape it Up' and the team will be featuring products by Jane Davenport this week!  I had not used Jane's products before but now, I have to say, I have a new addiction and I so enjoyed making this project for the challenge!
I created a colourful journal using Jane Davenport Washi Tape, Mixed Media papers and Face stamps along with Eileen Hull's new Wrapped Journal die, all of which can be obtained from Simon Says Stamp online shop.
I started by gathering my supplies together, they are listed below (from Simon Says Stamp)
1) Start by die cutting the Wrapped Journal in matboard (mountboard) and then paint with Dina Wakley Heavy Body Paint in Sky.
2) Apply the Washi Tape in the pattern of your choice (I created a weave pattern)
3)  Stamp, cut and colour the face stamp (I added short hair by hand drawing it and the frill on the dress was created with the Washi Tape) (bottom left)
4) Use the face stamp set to create a second face (I added some flowing hair, in Jane's style)
5) Line the inside of the journal with Jane's beautiful Mixed Media paper
6) Create signatures with the Mixed Media papers (Signatures measure 6.3/4" x 4.7/8")
7) Create tuck spots and pockets on the journal back, if desired
To finish the cover, the face was glued to the front and some beautiful sari ribbon from my stash provides a closure for the journal.
Handcrafted elements can be used as embellishments (I covered the clips with more washi tape to tone in with the papers I used).
A final look at the journal from the inside.

Each week there is a fabulous $50 gift voucher on offer!

All the of the products that I used, which are available from Simon Says Stamp 
are listed above.
I hope you will pop over to Simon Says Stamp Monday Challenge to see what the talented Design Team have made, and of course it would be lovely to see you join in the challenge!

I would like to enter my journal into the Craft Stamper Make It, Take It Challenge (August).  The faces in the journal are hand stamped and coloured.

Thank you so much for your visit, I hope to see you again soon and/or next Monday for my second project for Simon Says Stamp!

Hugs, Anne xx

Wednesday, 1 August 2018

Mini Album Makers August Challenge

Hello Friends

It is time for a new challenge at Mini Album Makers and, as always we would love to have you join in the challenge.

Our Rules are very straightforward : Any Handmade Book goes.  Enter any form of handmade mini album, scrapbook, journal or book art.  Our focus is on completed works, so no layouts or journal spreads that are not part of a complete handmade book project. 

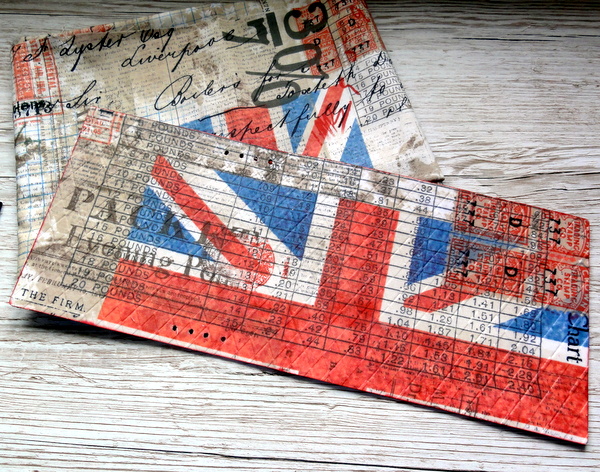
Since Eileen Hull is our Sponsor for this month, I have used her new Wrapped Journal die, along my my favourite Tim Holtz fabric to create a journal.
 I used Eileen's new die (Sizzix 662816) and Tim Holtz fabric from his Correspondence range from a year or so ago (which Eileen has just reminded me (thank you!), was picked up when she took me to a fabulous Joann's shop in Phoenix, Arizona, earlier this year!).  I also used a piece of Tim's Idea-ology range for the closure.
I attached the fabric to one side of  heavyweight card with Multi Matte Medium, left it to dry overnight and die cut it. Below is a view of the outside.
A view from the inside.  I attached the inside fabric separately, again with Multi Matte Medium and left this overnight to dry and then machine stitched all around the edges, with straight and zig zag stitches.  The glue works well but if the journal is going to get lots of use, the stitching holds the fabric in place quite securely.
I die cut Tim Holtz's Stitched Slots for the inside front cover.  I also stamped Tim's ticket stamps and die cut them with the matching dies.  I added an Idea-ology tag to finish it off.  I also made an envelope for the back of the journal with Tim's Correspondence papers.  I love that he has matching fabrics and papers.  I used 1mm red elastic to string the journal, ready for the signatures.
I created two signatures by covering card with more of the fabric, for the covers, stitching around the edges and attaching the inserts to the covers using a simple pamphlet stitch. The covers measure 6.3/4" x 4.7/8 and the insert pages are just slightly smaller.
I often make pocketed wallet inserts for my journals.  Again, I covered the card with fabric, before creating the wallet.  There is a plan below should you wish to create one of these.
To make the wallet, start by cutting heavyweight card to 11.1/2" x 5.1/4".  Score at 2.1/2", 5.3/4" and 9.1/4".  Score on the long side at 1/2" - this creates the fold up pieces which form the lower edge of the wallet insert.

I like to trim the two side edges by rounding them as shown below.  However, if you prefer the pockets to be straight you can just leave them as is.  Your trimmed piece should look like the sample below.  Fold the sides in and then glue the small tabs, at the bottom, to the outside of the folded in edges, as shown above.

As I mentioned earlier, Eileen Hull is our wonderful Sponsor this month and she is offering one of her new dies - Journaling Cards - Hearts (Sizzix 662812)  to one lucky winner.
Eileen Hull
Website - http://www.eileenhull.com/
Facebook - https://www.facebook.com/eileenhulldesigns/
Eileen Hull Facebook Fan Club - https://www.facebook.com/groups/278232919290545/
Shop - https://www.etsy.com/shop/EileenHull?ref=pr_shop_more

.......................................................

I hope you can pay a visit to Mini Album Makers blog to see what my talented team mates have made, you will not be disappointed. Of course, we would love to see you join in the challenge too!

Thanks for your visit, I hope to see you again very soon!

Hugs,  Anne  xx
Related Posts Plugin for WordPress, Blogger...

Labels