PRIVACY POLICY

Saturday, 23 June 2018

Blogger Comment Issue Solved!

Hello Friends

Just a quick post today.  If you have been having problems getting your Blogger comments via email, there is a solution which is working for me and many others too!  My dear friend Darnell posted the solution on her blog and I am sharing it here:

* Go to your dashboard
* Click on Settings
* Click on Email
* Delete your email address and click on 'Save Settings' in upper right
* Re-enter your email address and click on 'Save Settings' again
* You will then receive an email in your inbox from Blogger confirming that you want to subscribe
* Click on the underlined word 'Subscribe' in the email

Please share if you have other friends/Design Teams where this issue has been a problem.

Have a lovely weekend!
Hugs, Anne xx 

Wednesday, 13 June 2018

Book Club 2 - Eileen Hull - Wrapped Journal

Hello Friends

Eileen Hull's long awaited Wrapped Journal (Sizzix 662816) is about to be released and I, for one, cannot wait to get my hands on the new die (the Inspiration Team only had access to the prototype up to now).

Eileen's Inspiration Team were given die cuts to make samples for Creativation and this project is one of the first ones I made.  As some of you know, I love leather and felt and this one is made from 3mm pure wool felt.... it is very tactile...
Starting with the die cut and some beautiful 3mm felt, acrylic paint, strong glue and a piece of lace, cut the felt to fit the die cut.  Felt can be cut very easily with this Bigz XL die, this felt is quite thick and I used a Premium Crease Pad to prevent the score lines from cutting right through.  This is not necessary, it is just my preference when using thick felt (or leather).
The lace was added to the felt first, it was stitched and glued in place.  A few French knots were added, as an accent, using red embroidery thread.
Paint the inside of the die cut before gluing this onto the felt die cut and leave overnight to dry.  Attach the closure string (made with Eileen's Twist & Style Tool) by gluing it between the felt and the journal die cut.  A heart shaped button was added to the front for the closure string to fasten to.  String the journal with elastic to hold four signatures.  
There is a lot of room in this journal and you can make quite large signatures.  Signature covers can be cut from Eileen's Passport die, they fit beautifully in this Wrapped Journal.
For this Journal I created three signatures and one pocket insert.
Here is a view of the back of the finished Journal.
This whole journal goes together like a dream, it is a lovely shape, it can be made thick or thin depending on the thickness of the signatures and it is such a handy size to fit in a purse/handbag.  

I hope you enjoyed seeing my first Wrapped Journal, there are more to come!  Thanks so much for your visit and I hope to see you again soon!

Hugs, Anne xx

Monday, 11 June 2018

AALL and CREATE weekend...

Hello Friends!

Firstly, I must apologies if I have not visited you, I have had two very busy and wonderful crafty weekends away, lucky me!

This weekend I visited That's Crafty in London for the first leg of  AALL & Create's World Tour and what a fabulous weekend it was too!  I just wish I could have continued on to day 3 too!  It was worth the seven hour journey there....

Out of respect to the individual designers I cannot share any of the details with you but I hope you enjoy seeing the creations we made.
My first class was with the hugely talented Tracy Evans who taught us some amazing techniques (with her own wonderful range of stamps and stencils)  to create a beautiful textured tag.   I am totally in love with this tag!  Tracy's enthusiasm is very infectious!
The afternoon class, also with Tracy saw us using beautiful bold colours to make two different styles of accordion cards.  Lots of inky, painty and stamping goodness!
Day two was spent with Aida Domisiewicz (also the owner of 13Arts) using lots of Aida's exclusive 13Arts products and Aida's AALL&Create stamps and stencils.  I was totally out of my comfort zone making this beautiful project but I loved every minute of it!

As well as meeting up again with the adorable Autour De Mwa (Abs), it was so lovely to meet more of the AALLandCreate Designers, Aida, Olga Heldwein and Fiona Paltridge and of course my dear friend Tracy Evans.  I felt like I was in the presence of Crafting Royalty - thank you to each and every one of them for making the weekend lots of fun, I have not laughed so much for ages!!  

Along with learning new techniques, meeting up with crafty idols, it was incredible to meet wonderful new friends too - Gayna Hurst, Donna (Ragdoll), Tina Thompson-Theis and so many others.  Laura Holland and Graham ensured that the whole weekend ran smoothly and of course the shop was a huge temptation!  Huge thanks to Laura and Graham!

AALLandCreate stamps and stencils are available worldwide, you can see a full list of stockists HERE.

I am adding project 1 to The Mixed Media Monthly challenge (sadly it is their last one).  Project 1 has thread wrapped around the butterfly and string wrapped around the wire at the top.
Image may contain: text

Thanks so much for your visit, I hope to see you again soon with a new
Eileen Hull project!

Hugs, Anne xx

Wednesday, 6 June 2018

Happy Birthday Rachel

Hello Friends

I had the immense pleasure of attending the birthday celebrations last weekend, of my dear and beautiful friend Rachel, who was a very young 50 years old!

Rachel treated us to a crafty day with the very talented Jo Rice of JR Crafts, who I have long admired but only recently had the pleasure of meeting.  Jo taught us a wonderful project - making an ATC box.  I won't share the details because it is a class Jo teaches.
I wanted my box to have a red hue.  Jo brought lots of bits and pieces for us to choose from and I chose quite a random selection for the outside of my box.
The inside has room for quite a few ATCs, so now I have somewhere to store some of my rather large collection of ATCs.
I really enjoyed the class and learned new techniques which I will definitely use going forward!  Even though several people had not done a lot of crafting in the past, they all made really beautiful boxes and had a wonderful time - a testament to Jo's teaching!
The evening was taken up by a Ceilidh which was also great fun!

My thanks to Rachel, Gwen, Jo, Sandy, Lucy and Penny and all the other lovely people who attended the Craft class, we had such fun!

Thanks for your visit, I hope to see you again soon!

Hugs, Anne xx

Friday, 1 June 2018

Mini Album Makers - June Challenge

Hello Friends

The first of the month brings a new challenge over at Mini Album Makers.  It would be lovely if you could join us there, the rules are simple -

Any Handmade Book goes.  Enter any form of handmade mini album, scrapbook, journal or book art.  Our focus is on completed works, so no layouts or journal spreads that are not part of a complete handmade book project.  See here for full details.
I wanted to make a watercolour notebook in a handy size to carry around, and to try my hand at coptic stitching/binding, so I combined both. 
I started with heavy black card and used Dina Wakley Media Acrylic paint in Turquoise along with a Stencil Girl stencil - 'Squared on 6' by Mary Beth Shaw, which you can find HERE.  I placed the paint on my mat and brayered it through the stencil.
I used a piece of cut a dry foam to add a bit more depth of colour.  I do love the contrast between the turquoise and black!

I cut two pieces of black card to 5.3/4" x 4.1/4".  I then cut 4 pieces of the stencilled card to 5.1/2" x 4" and added one to each of the covers, attaching one both inside and out, for strength.
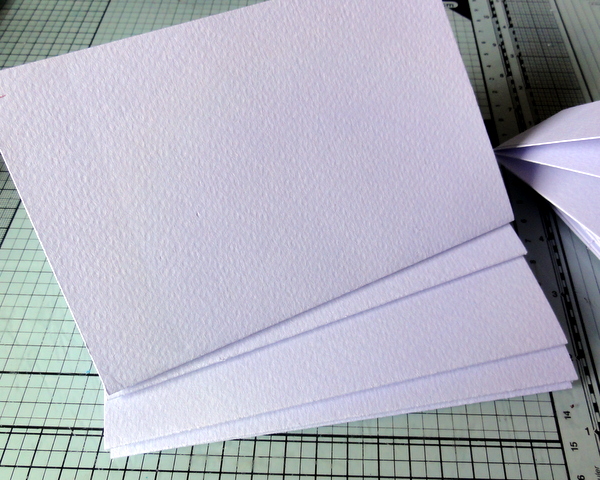
I made four signatures, with two sheets of watercolour for each signature.  These measure 5.3/4" x 4.1/4" each.  Now it was time to put the little watercolour album together.

I punched five holes in each cover, measuring carefully so that both covers have identical holes, approx 1/4" from the edge.

The signatures each have five holes punched through the spine to correspond with the covers.

As this was my first attempt at Coptic stitching/binding, I followed an excellent video tutorial by Sea Lemon, which you can find HERE (it is much easier to follow than me writing out each step). I found the video very easy to follow and my first result was not too bad!
The real beauty of this type of binding is that your book will lie flat, no matter where you open it!
Next, I wanted to create a label for the front, one that would also lie flat and not impede my watercolouring on the inside pages.

I die cut the letters and used Lindy's Stamp Gang (another of our lovely Sponsors) Magical Shakers in Guten Teal Tag and Cuckoo Clock Cardinal to colour the letters.  Once dry I gave the letters a coat of Glossy Crackle Accent.  The letters were added to card coloured with the same paint as before and matted with plain black card.
So, there we have it, a nice compact little album that fits nicely into my handbag/purse.

Tip:  I used watercolour paper and constantly putting the needle in and out of the paper made it 'pill' slightly, which I don't mind but I think it would probably work better with mixed media type paper.

Our generous Sponsor this month is Stencil Girl who are offering a $25 Gift Certificate to one lucky winner.

Website - http://www.stencilgirlproducts.com/
Blog - http://www.stencilgirltalk.com/
YouTube - https://www.youtube.com/user/StencilGirlProducts

It would be lovely if you could take a trip over to Mini Album Makers to see the wonderful and inspiring projects by my lovely team mates (we have a couple of new designers joining us this month too).

Thanks so much for your visit and I hope to see you again soon!

Hugs, Anne xxx