Pinterest

Tuesday 22 October 2019

Tracy Evans' New Release for AALL & Create

Hello Friends

I was so thrilled to be able to create some projects for Tracy Evans with her latest release of stamps for AALL & Create.  I am continuing this week with another of Tracy's beautiful new stamps,
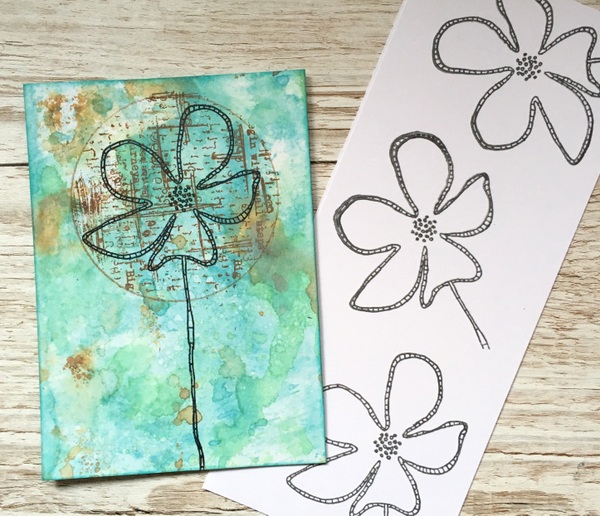
Wild and Free (#238), to create a journal.

I die cut one of Eileen Hull's Notebook Journals for my base.  The mountboard was given a coat of Gesso to give me a good base for watercolouring.
I coloured the flower with watercolour paint, let it dry and then spritzed the journal lightly and just dribbled paint in sections over the cover, letting them blend and dry naturally.  I mixed in a little Iridescent medium into the paint to give a light shine.
This is a close up of the finished cover, you can see a little of the Iridescent shine.  I coloured a second flower and decoupaged this up on the cover and added an elastic closure.
For the inside I created a small notebook and also a writing block.
For the cover of the writing block, I used a 'tissue' technique that Tracy showed in one of her Hochanda demos last weekend, I was quite pleased with the result!  I painted it with watercolours.
You can find a list of stockists for the whole of the new stamp release HERE, including countries around the world.  Whilst you can purchase direct  AALL & Create advocate the use of your local stockist to purchase the stamps and stencils.

....................................................................................

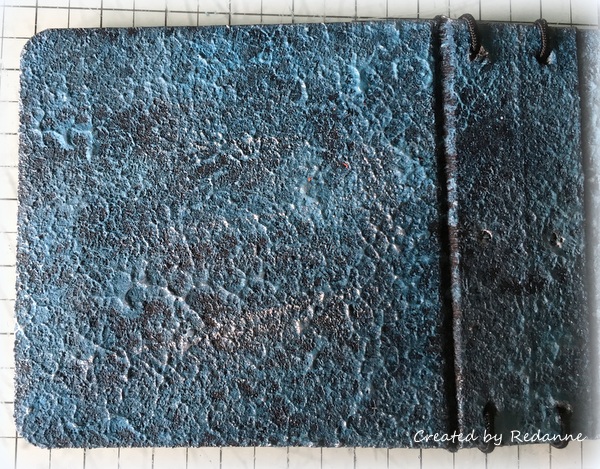
Finally, I am sharing a few of the samples that I made for Tracy's recent shows,
it was lovely to see them on TV!

Thanks so much for your visit, it is much appreciated and I hope to see you
again soon.

Hugs, Anne xxx

Tuesday 15 October 2019

Wicked King Mortimer for AALL & Create

Hello Friends

It is time to share another GDT post for AALL & Create.  Since I love Halloween and/or any excuse for using Olga's wonderful skull stamp set (#66 King Mortimer along with stamp set #49), I used a mixed media board and watercolours to create a rather colourful Halloween project.
I started with a 7.1/2" x 5.1/2" media board and applied several different colours of watercolour paint, just splodging it on randomly here and there and allowing the colours to mix together.  Once the colours had mixed as much as I wanted them to I used my heat gun to dry it off.  Tip:  If you want  the colours to remain nice and bright just allow the paints to dry naturally.

I used a black pen to doodle around the edges.
I stamped and fussy cut the skulls and then dripped some of the same watercolour paint on to each skull.

I took a piece of gauze and again dabbed watercolour paints here and there, spritzed it with water, scrunched it and then dried it with the heat gun.
I placed the coloured gauze onto the board and added the skulls on top, adding a crown to the
top and bottom skull.

I stamped and coloured King Mortimer's crown and added a sentiment to the right top corner, this was embossed to make it stand out a little more.
I added a further sentiment to the bottom left, again embossing it.
These are the AALL & Create stamps sets I used in my project.

The stamps can be purchased from AALL & Create Boutique HERE.  AALL & Create do prefer, wherever possible, that you support your local craft shops and they provide a full list of worldwide stockists HERE.

Thanks so much for your visit, I really appreciate it and hope to see you again soon.

Hugs, Anne xx

Tuesday 8 October 2019

Eclectic Stems for AALL & Create

Hello Friends

Just a quick post from me today to share my GDT post for AALL & Create.  I needed to
create a birthday card for a friend,
I used AALL & Create stamp sets #199 and #210, both by Tracy Evans.
I created a background using Distress Oxide inks in Peacock Feathers and Gathered Twigs.
Next I cut a circle from card, placed the outer part on the background and stamped through the hole using stamp set #210 (Background Mash Up) using Gathered Twigs Distress Ink.

I stamped out the flower again, coloured two with Distress Ink and cut these out to use as
 extra layers.
I went around the finished circle with a wet paintbrush to drag some of the colour out.  To finish off I layered the flower up and added some glitter to the centre of the flower.
The sentiment on the finished card is also from stamp set #199.

Thanks so much for your visit, as always, I appreciate it very much.

Hugs, Anne xxx


Thursday 3 October 2019

Eileen Hull Pocket Notebook Release Party

Hello Friends

Eileen Hull released a new Pocket Notebook (Sizzix 663638) during her Paper Trail visit to the UK recently, the official launch date for the new die is 1st October and we are celebrating that release with a Blog Hop Party!


I love Halloween and since it falls this month, I used the new Pocket Notebook die to create
a spooky Pirate/Skull notebook.

I started by die cutting the Pocket Notebook from Kraft coloured mount board.

 I covered the front and back with some black corrugated card, using my Cropadile to punch the Notebook holes into the corrugated card.
 I used Antique Linen Distress Oxide to lighten the edges of the Notebook.
I prepped the skull and bones from the Tim Holtz  Skull & Crossbones die set, darkening the edges with Eileen Hull's ColorBox Blends black ink.  I used some Tim Holtz Mummy Cloth to create a headscarf and also added a pirate patch to the eye of the skull.
I coloured the edges of the inside of the Notebook with Eileen Hull's ColorBox Blends and strung it with black elastic in readiness for the signatures.
I created a pocket for the inside back of the Notebook.  I used a Tim Holtz Cobweb Thinlits die to add an embellishment to the pocket, along with a Tim Holtz Halloween Quote Chip.
I created three signatures (6.1/2" x 3.3/4") for the Notebook, cutting them from black card.  I stamped two of the signatures using the Tim Holtz Cadaverous Stamp and added a paper skeleton on one.  Again I used Tim Holtz Halloween Quote Chips to finish off.
 I created a hanging charm to attach to the side.
To finish off I added an elastic closure to the side of the Notebook.

I hope you will join in the Release Party Blog Hop.  You can see all the details of the prizes, in Eileen Hull's post HERE.  

Below are the details of the participants, you should have arrived here after visiting Maggi Harding, but if you get lost you can always go back to Eileen's blog (details above):

Susie Bentz
Pam Bray
Julia Aston
Annette Green
Kathy Clements
Cheryl Waters
Ginger Ropp
Mitsyana Wright
Debbie Brankston
Anita Houston
Maggi Harding
Anne Redfern (you are here)
Jenny Marples
Betsy Skagen
Anna-Karin Evaldsson
Tonya Trantham
Madeline Arendt
Lisa Hoel
Karen Bearse
Sue Eldred
Nicole Wright
Elizabeth Robinson


Thanks for stopping by, I really appreciate it!

Hugs, Anne xx

Tuesday 1 October 2019

Mini Album Makers - Game of Thrones

Hello Friends

The beginning of October means it is time for a new challenge over at Mini Album Makers.

I was so sad when Game of Thrones ended and as I had bought a few little items of memorabilia, I thought I would create some mini books to commemorate my favourite families from the series.
I started by using a mini book kit by Tando-Creative, these books measure 2.1/4" x 2.1/4" with a 3/4" deep spine.  I used construction tape to join the pieces, with a small gap to enable the books to fold easily.
I applied a coat of black gesso to all sides.
For the blue and red books I used the same technique on the covers.  I applied another coat of black Gesso, this time using a stippling brush to create some texture.  Once dry I applied a layer of watered down paint (dark blue and dark red) again with a stippling action to give a mottled appearance.


For the yellow book I applied a layer of crackle paste and once dry I added a layer of yellow oxide paint.  There was a little red paint on my brush but I liked the effect it created here and there.

To create the signatures I cut white card to 4.1/8" x 2.1/4", making a 2.1/4" insert.  For the covers I cut black card to 4.1/4" x 2.3/8" .  I created 5 pages for each book.
Once the signatures were created I added a 'House Badge' to each of the books along with the House name.  Not shown, I printed out a little story about each 'house' and added these to the books.

To finish off  I added the signatures with elastic and also created elastic closures for each signature.

Our Sponsor this month is Seth Apter who is offering a full set of his new mini stamps
by PaperArtsy to one (very) lucky participant!
Website - http://www.sethapter.com/
Instagram - https://www.instagram.com/sethapter/
Facebook - https://www.facebook.com/thealteredpage
Twitter - https://twitter.com/sethapter

I hope you will join in with us at Mini Album Makers, it would be lovely to see you there.  Our rules are fairy simple: Any Handmade Book Goes.  Enter any form of handmade mini albums, scrapbooks, journals and book arts.  Our focus is on completed works, so no layouts or journal spreads that are not part of a complete handmade book project.  Full details are on our website.


Thanks so much for your visit, it is a busy week for me, with several posts,
I really appreciate you taking time.

Hugs, Anne xxx

Related Posts Plugin for WordPress, Blogger...

Labels